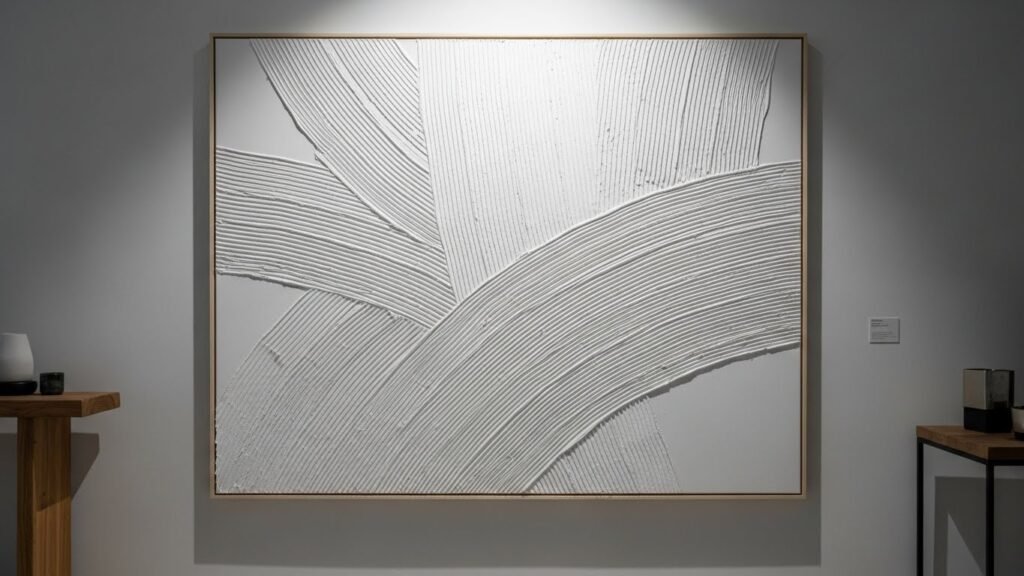
Textured Canvas Art is blowing up the Interior Design scene right now. You see this impactful wall art everywhere. It adds so much character to any Home Renovation projects. The problem? The price tag at big box stores is usually way too high. That’s a total bummer.
The great news is you can easily make your own. You can create the same stunning artwork for a tiny fraction of the cost. This DIY project is super simple. It requires absolutely no artistic ability whatsoever. It’s perfect for a fun weekend activity.
This comprehensive guide gives you all the step-by-step guides you need. You’ll learn how to create textured paintings that look hand-painted and professional. We cover materials, techniques, and design solutions. You will make a true statement piece. Let’s dive in!
Planning Your Textured Art Project
Deciding on Scale and Composition
Before grabbing your paintbrush, you need a solid plan. Think about the space where the painting will hang. How big does the canvas need to be to fill the walls? Do you want a large statement piece or several smaller ones?
Next, decide on your composition and texture. Will you use geometric shapes or abstract tribal pattern lines? The possibilities are endless. Think about the line types you want. You are simply sketching this initial design.
You can lightly sketch the pattern right onto your paper or canvas. If you have a specific pattern in mind, like uniform wave textures, plan for a comb or scraping tool. Get your ideas on the canvas.
Canvas Selection and Preparation
The beauty of this DIY is its flexibility. You do not need to buy a brand-new canvas art surface.
- Thrifting is Key: I highly recommend checking thrift stores or Facebook marketplace. You can find cheap, used canvases.
- Repurposing: This is a perfect opportunity for renovation by decorating. You can paint right over an existing design that you no longer like.
- Framing: A wood frame or a floating frame instantly elevates the piece. It brings the whole look together. If your canvas isn’t Framed, you can building one yourself.
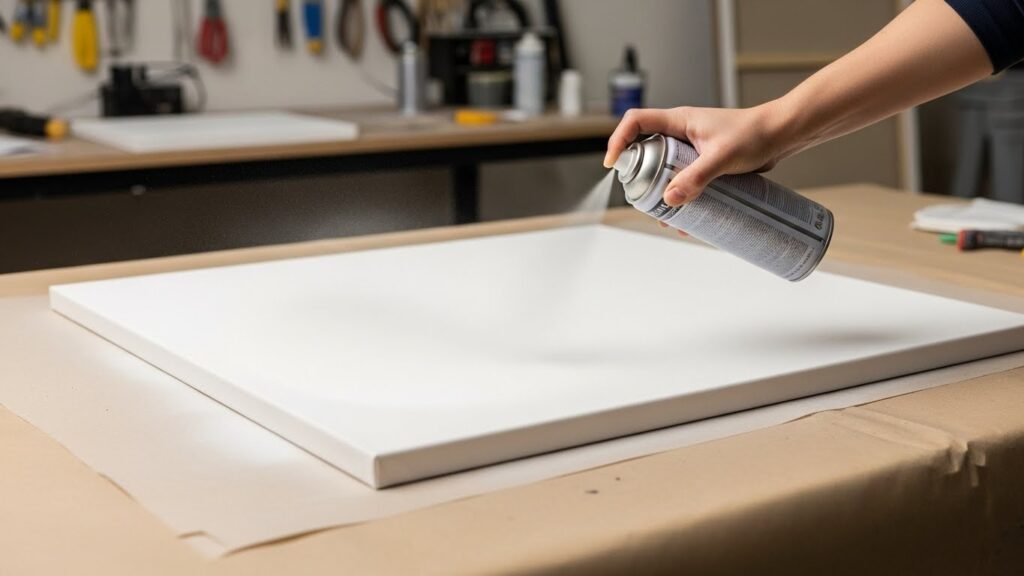
Importance of Priming and the Base Coat
This initial step is key for a good final product. If you use a used canvas or an unprimed one, you must prime it first.
- Purpose: Priming creates a barrier. This barrier prevents the canvas from soaking up the water in the texture medium.
- Bleed Through: Priming stops any existing design or colors from bleed through the new basecoat.
- Materials: You can use an official Primer or simple white paint. A spray primer is easy and fast. Make sure you get the edges too.
Essential Materials: The Texture Medium Deep Dive
Having the right Materials is half the battle. You don’t need a lot of complicated items, just a trip to the local hardware store.
- Canvas: Your chosen surface.
- Base/Primer: white paint or primer.
- Texture Medium: Joint compound or plaster of paris are the stars.
- Application Tools: Putty knife, trowels, and painting knives.
- Detail Tools: notched trowels, a fork, or even your fingers.
- Color/Sealing: Acrylic paints, clear sealant, or matte poly.
- Tape: Painter’s tape.
The Texture Mediums (Comparative Analysis)
You have two main contenders for creating grittier texture and structure: Joint compound and plaster. Both have unique pros and cons.
Joint Compound: This is the most common choice for DIYers. It’s super easy to apply and move around. It’s forgiving because it stays wet for a long time. However, you must let it dry and set fully cured overnight.
Plaster of Paris: This is great for a highly grainier texture. It dries quickly and becomes very hard. This means you can add multiple layers faster. Be aware that the powder needs precise water mixing.
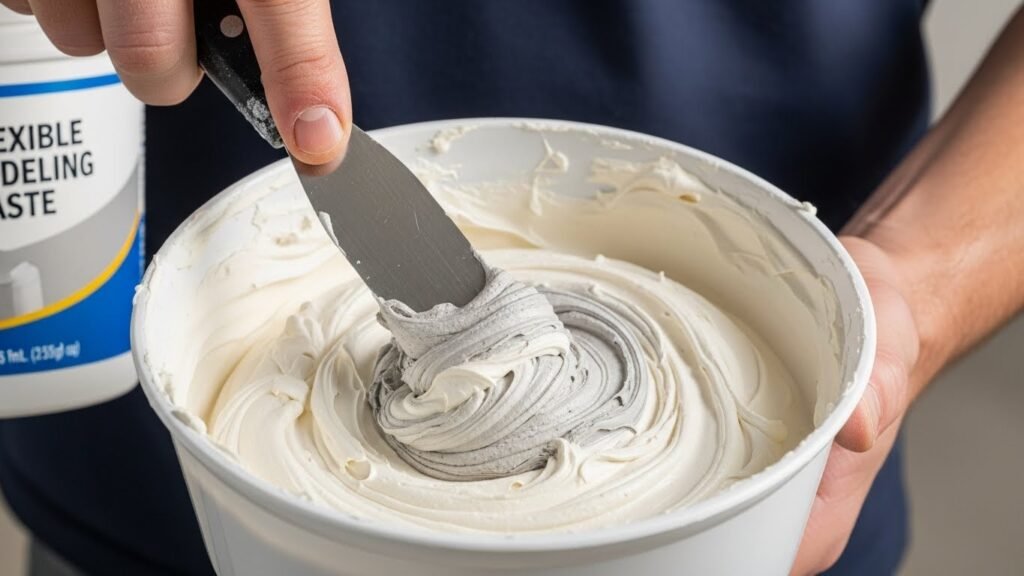
Advanced Tip (Crack Prevention): To ensure your design lasts and doesn’t crack due to temperature changes, mix in flexible modeling paste. This keeps the material slightly elastic.
Application and Texturizing Tools
The magic happens when you use these simple tools.
- Putty Knife/Trowels: These spread the base layer evenly. For large dimensions, a wide trowel is ideal.
- Detail Tools: notched trowels give those cool, repeating lines. A comb or fork creates uniform wave textures. You can even use your fingers to swirl the surface.
Step-by-Step DIY Textured Art Techniques
Technique 1: Using Joint Compound or Plaster
Preparing and Applying the Base Layer
You are now ready to start the tutorial. Protect any wood frame with Painter’s tape.
- Priming Execution: Apply your primer or base coat. Let it dry completely.
- Material Preparation and Mixing: If using plaster powder, mix only what you can use immediately. It will be difficult to spreading once it hardens.
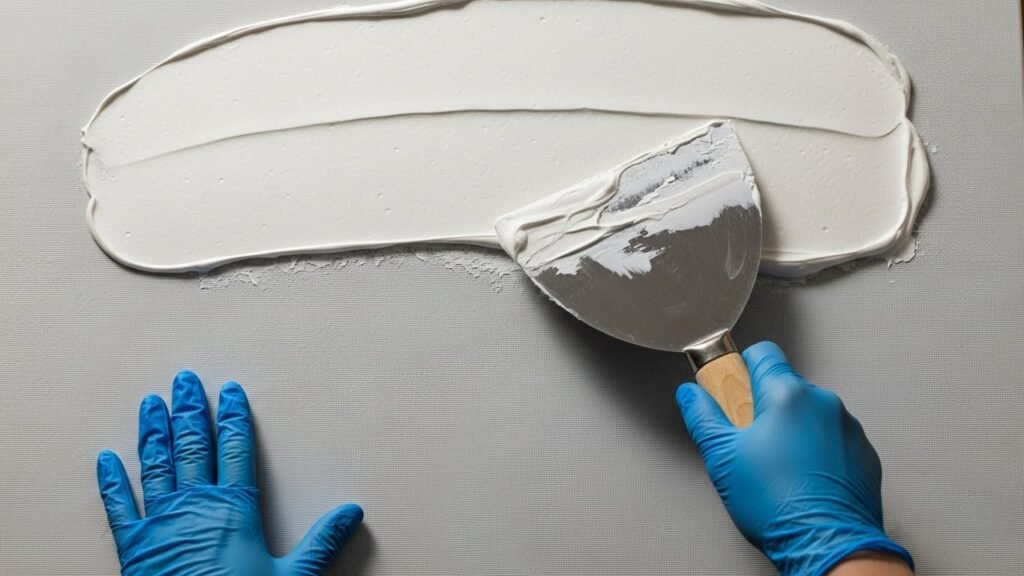
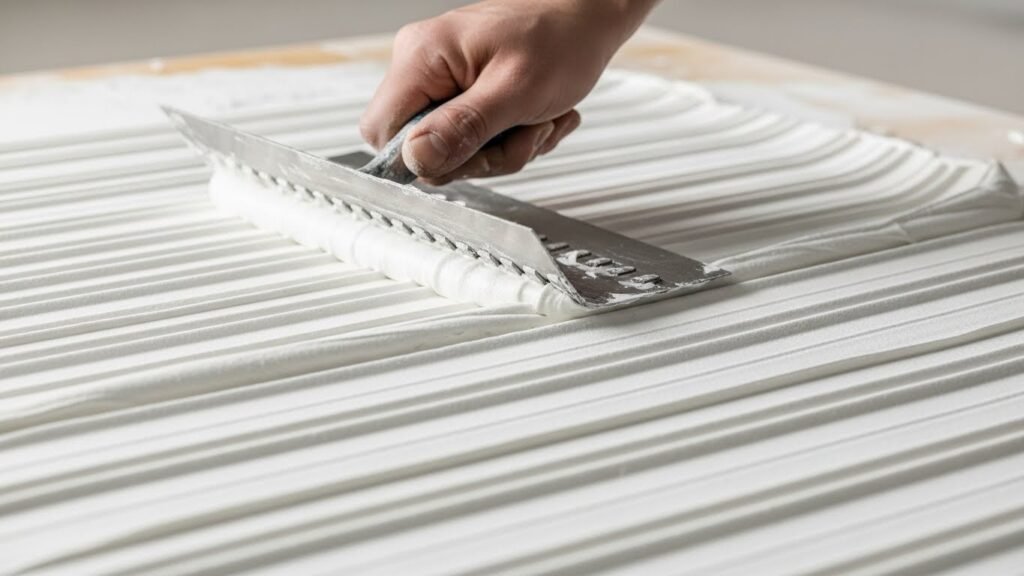
- Initial Application Strategy: Scoop up a few good globs of Joint compound. Use a Putty knife or trowel. Spread it across the canvas.
You just want to make sure the entire surface is covered. Do not go too heavy with the medium.
- Thickness Limit: Never exceed about 1/4 inch thickness. Too much material can make the canvas sag. It can also lead to cracking later.
- Coloring the Base: If you want a darker base layer, mix in some Acrylic paints now. This gives the background subtle color.
- Initial Curing Protocol: Once the base layer is applied, you must allow the medium to set and dry. Joint compound needs to cure fully cured overnight. Plaster dries much faster.
Technique 1: Joint Compound and Plaster Mastery
This section shows you how to transform the flat base layer into dynamic Textured Canvas Art. We move past the simple application and start shaping the design using painting techniques and layering. You will create professional artwork with textures that catch the light beautifully.
Creating Texture and Depth (Etching, Layering, and Blending)
Once your base layer is set, the fun really begins. This is where you become the artists and embrace the process of DIYers. There’s no wrong way to do this.
The “Play” Step & Etching
You are now ready to apply and sculpt your texture. You can use various tools to achieve different results.
- Tool Use: Use your notched trowels to drag across the wet compound. This creates deep, uniform grooves or lines.
- Household Items: Grab a fork, a stiff paintbrush, or even a scraping tool. These items create random, grittier texture.
- Fingers: Your fingers are fantastic tools for organic, swirling motions. This adds a unique hand-painted look.
You are essentially etching into the thick medium. If you mess up, don’t sweat it. Just smooth the area back out with a Putty knife and start over. It is very forgiving. Just remember to remove any excess mud from your tool for cleaner line definition.
Sanding and Refinement
Before you add your next layering of colors or medium, some fine tuning might be necessary.
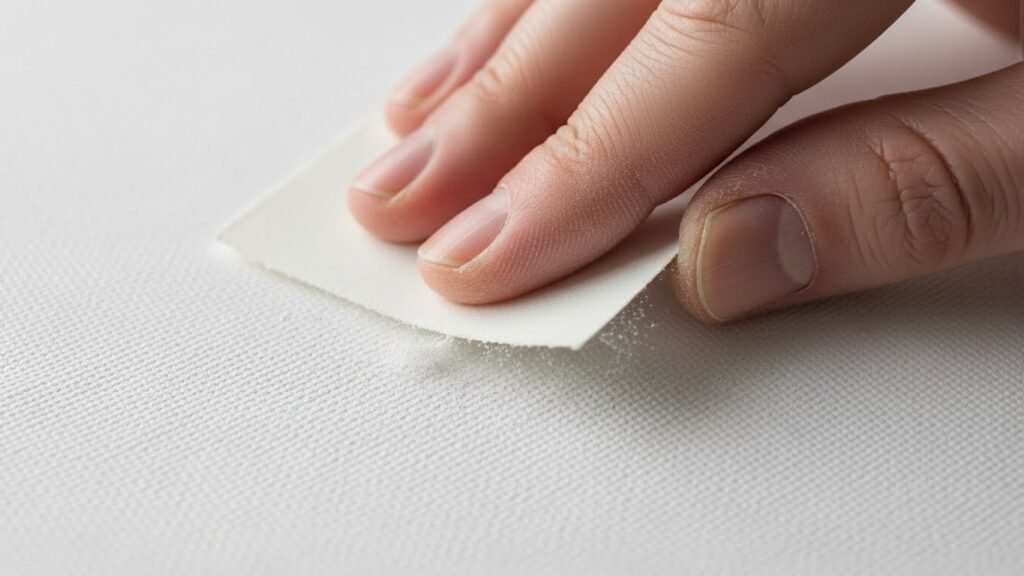
- Purpose: If you don’t want those initial knife marks or raised areas to be too harsh, you need to sand.
- Execution: Once the mud is fully cured, lightly hand sandpaper the rougher sections. Use a 150 grit sandpaper for quick smoothing.
- Goal: The sanding prepares the surface for the next base layer.
Multi-Layering for Depth (The Patina Effect)
The secret to sophisticated Textured Art is layering. You shouldn’t just stick to one shade or thickness. Layering adds deep dimension and subtle shadow play.
- Second Layer Application: Apply a thin second base layer. You can use the same medium or switch. For example, use plaster on top of Joint compound.
- Color Blending: This is your chance to use different colors. Mix a slightly different shade of acrylic paint into your new batch of medium. This gives you two similar but distinct tones.
- Aged Patina: Experts recommend 3-4 subtle shades to achieve that beautiful aged patina. This makes the artwork look truly vintage and valuable.
- Minimalist Look: If you prefer a minimalist look, stick to just two different tones in the same color family (e.g., light gray over white).
Blending Techniques
Sometimes the application can look too segmented or dry. You need to blend the colors for a seamless look.
- Using Water: If the plaster is too dry on the canvas, use a wet brush. Go over the top layer to blend the colors together. This softens the edges and removes harsh trowel marks.
- Experimentation: You can use water, diluted paint, or even very diluted plaster mix. Experiment to see what you like best.
Final Layer Application
The final round seals the deal. You are completing the process of layering.
- Goal: Apply a final, thin layer that allows some of the underlying layers to peek through. This adds genuine depth and complexity.
- Color: Often, this final coat is a more diluted mix of plain white plaster. This brightens the piece back up.
- Drying: Let the entire statement piece dry and set fully cured overnight again. This prevents issues later on.
Troubleshooting: Material Comparison and Expert Tips
Making the right material choice impacts your DIY tutorial experience.
Joint Compound vs. Plaster: A Deeper Look
- Weight: Joint compound is very lightweight. It won’t affect the hanging of your art. Plaster is heavier. Even so, it rarely requires specialized hanging hardware unless the piece is huge.
- Cracking: Cracking is possible with any medium. It often happens if the layers are too thick. Flexible modeling paste is your best defense against cracking.
Addressing Application Issues
- “Why Won’t My Joint Compound Dry?”: This usually means you used too much material. You need to wait it out. There’s a strong chance you’ll see some flaking or cracking when it finally dries.
- Priming: It is helpful to prime a used canvas to prevent the existing design from having bleed through. It is less necessary for a new, pre-primed canvas. This makes the process cleaner.
Technique 2: Acrylic Paint Finishing and Protection
We have mastered using heavy materials like Joint compound and plaster. Now, we move to the next phase: finishing the artwork and protecting your statement piece. This part covers the alternative painting techniques using only acrylic paint, and the essential final steps of sanding, adding color, and sealing.
Technique 2: Textured Art with Heavy-Body Acrylic Paint
This method is perfect if you want a quicker turnaround. You can skip the mud and dry time of compound. It focuses on manipulating heavy-body acrylic paint itself to create texture.
Creating the Thick Paint Base
The key is the paint’s consistency. You need a high-quality heavy-body acrylic paint.
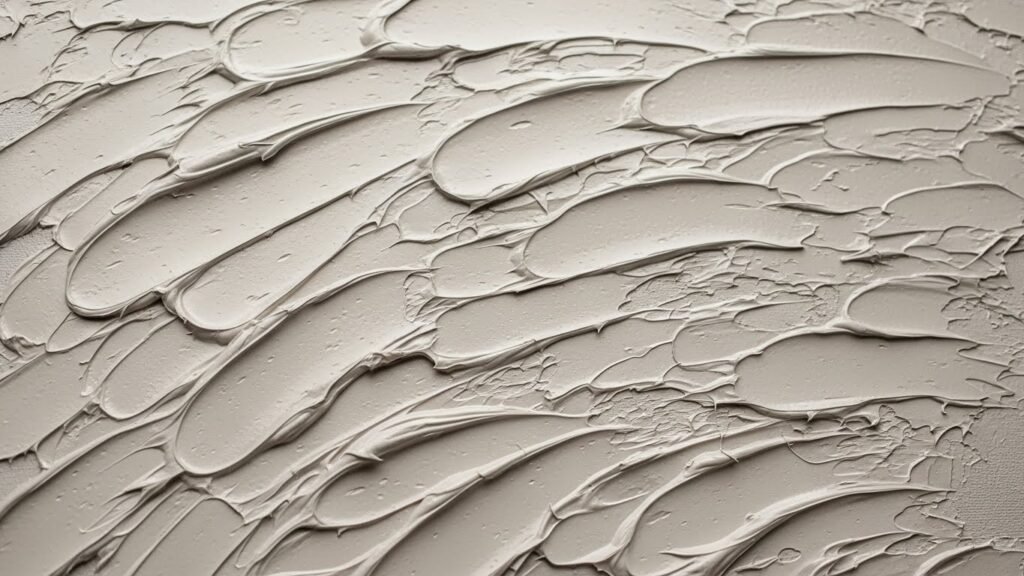
- Application: Apply a generous amount of paint to the surface. You want a thick layer that holds its shape.
- Character: Don’t worry about smoothing the surface. The paintbrush strokes provide natural texture. This immediately gives the piece a dynamic hand-painted look.
Etching and Accelerated Drying
Once the thick paint is down, you work fast before it sets.
- Etching: Take a small paintbrush or scraping tool. Etch your line composition into the wet paint. This is an easy way to create details. Remember to clean the tool for a sharp line.
- Drying: Use a hair dryer on a low setting. This speeds up the drying process. It ensures the thick layer of paint is ready for the next step.
Finishing and Sealing the Artwork
After your design is sculpted and fully cured, you need to refine the texture and lock it in. This is the difference between a high-end look and an unfinished DIY.
Final Curing, Sanding, and Sealing
This is a critical sequence for durability and aesthetics.
- Final Curing: Allow the entire artwork to set and dry completely, especially if using compound. If the base layer is not dry, the sealer will cause issues.
- Sanding for Polishing: Use 150 grit sandpaper for fine tuning. Gently smooth any harsh rougher or raised areas. This creates soft textures that feel natural.
- Water Blending Mechanics: After sanding, remove the dust. Go over the top layer with a wet brush to blend.
- Joint Compound: Water will soften dried Joint compound. This causes the paint to bleed through slightly, which is great for natural blending.
- Plaster: Plaster is hard and won’t soften much with water.
- Sealing Purpose: Applying a sealant is essential. It protects your statement piece from dust, humidity, and minor scuffs. It drastically improves the lifespan of your projects.
Sealing Options and Warning
Your choice of sealant determines the final finish and look.
- Clear Sealants: If you love the soft white color of the raw compound, use a clear sealant. This preserves the original look.
- Best Protection: A liquid matte poly (oil or water based) provides the best protection. Brush on at least 1-2 coats evenly. This is crucial for a durable finish.
- Crucial Warning: Be aware that any sealer applied will generally darken the surface slightly. Always test it on a small, hidden edge first.
Adding Color and Shimmer
Color and metallic touches take your finished canvas art to the next level. This is where you finalize the design solutions.
Post-Cure Coloring
You can use the texture itself to enhance your colors.
- Coloring: Simply paint directly onto the fully cured and sealed surface. You can use Acrylic paints or even house paint. Use multiple shades for complexity.
- Layering: Apply a diluted color wash. The texture will catch the pigment in the deep areas, creating natural highlights.
Metallic Accents
Adding shimmer is a trick used by professional artists.
- Catch the Light: Metallics work exceptionally well on Textured pieces. The texture creates peaks and valleys. These peaks reflect the light differently. This makes the metallic accent catch the light from every angle.
- Materials: Use small amounts of gold leaf or metallic acrylic paint. Focus the shimmer on the highest raised areas of your design.
Troubleshooting: Application Issues
This quick review covers common problems you might encounter.
- Heavy Weight: Joint compound is very lightweight. It won’t require specialized hanging hardware. Plaster is heavier, but still easy to manage unless your dimensions are huge.
- “Why Won’t My Joint Compound Dry?”: If it’s been days, you used too much mud. You have to wait. There’s a high risk of cracking when it finally cures.
- Priming Necessity: Always prime a used canvas or a canvas with an existing design. This prevents any bleed through and ensures your base layer is pure. This makes the whole tutorial worth it.
Advanced FAQs and Expert Analysis
We have covered the Materials, techniques, and sealing of your DIY Textured Canvas Art. This final section addresses common questions, dives deeper into material science, and offers crucial design solutions for long-term success. This knowledge ensures your projects are durable and look amazing for years.
Troubleshooting and Expert FAQs (In-Depth Analysis)
Understanding the properties of your texture medium is key to success. This information helps you avoid costly mistakes during your Home Renovation effort.
Material Comparison and Selection
- Joint Compound/Drywall Mud: The primary advantage is its smooth, creamy texture. It’s easy to apply, making it great for beginner artists. Its major drawback is the long drying process, often requiring overnight curing.
- Plaster of Paris: Choose this for a faster process. It achieves a Coarser, grainier texture quickly. Remember it gets hard fast. You must work quickly when spreading this medium.
- Weight: Joint compound is very lightweight. It won’t impact hanging hardware. Plaster is heavier. Even so, it rarely requires specialized hanging hardware unless the piece is huge.
- Cracking: Cracking is possible with any medium. It often happens if the layers are too thick. Flexible modeling paste is your best defense against cracking.
Addressing Application and Drying Issues
- Preventing Cracks: Cracking can ruin a project. It often happens if layers are too thick or if the room has extreme temperature changes. To stop this, mix flexible modeling paste into your mud or plaster. This adds elasticity.
- “Why Won’t My Joint Compound Dry?”: If your Joint compound is still wet after several days, you used too much material. It is too thick layer. You have to wait for it to dry, but be prepared for potential flaking or cracking when it finally cures.
Aesthetic and Design Questions
These tips help you move from a tutorial follower to an advanced DIYer with a strong artistic style.
The Rule of Layers
- Aged Patina: Achieving a high-end, vintage oil painting look relies on layering. Use 3-4 shades of color and medium for optimal depth and complexity. This allows the underlying layers to add shadow.
- Minimalist Look: If you prefer a minimalist look, stick to just two different tones in the same color. For example, a bright white top layer over a cool off-white basecoat.
Advanced Texturizing Tools
You do not need specialized tools. Look around your house for inspiration.
- Combs/Forks: Excellent for repeating patterns or uniform wave textures.
- Sponges: Create a dappled or concrete lamps texture.
- Scraping Tool: A scraping tool with a notched edge can create sharp, defined line work for an abstract tribal pattern.
Preparation and Workspace Management
Creating amazing Textured Canvas Art is a thrilling DIY endeavor. However, Home Renovation projects involving mud and paint require smart preparation. A clean and safe workspace prevents headaches later.
Setting Up a Safe and Clean Workspace
It is crucial to prepare your surface before you start. This ensures you can focus on the design and not the cleanup.
- Ventilation First: Always work in a well-ventilated area. This is extremely important, especially when you use spray primer or clear sealant. You want fresh air moving through the room.
- Surface Protection: Lay down a drop cloth or old cardboard to protect your floors and tables. Plaster and Joint compound dust can be messy. It is much easy to clean up one big sheet than to scrub the floor.
- Safety Gear: Protect yourself from the mud and dust. Use gloves to keep your hands clean. Wear safety glasses when sanding or using aerosol paint. If you are doing a lot of sanding, wear a basic dust mask.
Managing Materials and Batches
Working efficiently with the Materials saves time and reduces waste. This is a smart design solutions strategy.
- Mixing Smart: If you choose plaster powder, only mix small batches. Plaster of Paris sets quickly. You do not want to waste material because it hardened before you could finish the layering.
- Wet Wipes: Keep a damp sponge or paper towels nearby. Wipe the Putty knife edge clean frequently. This stops hardened mud from messing up your texture.
Design Theory and Inspiration Beyond Abstract
While abstract line types are easy, your artwork can cover a huge range of styles. Think beyond the basic abstract tribal pattern. Use your canvas as a unique design element in your Interior Design.
Expanding Design Possibilities
Your DIY statement piece can mimic high-end finishes. You can create different looks with simple tools.
- Geometric Patterns: Create sharp, modern designs. After your initial base layer is dry, apply Painter’s tape. Press the tape down firmly to seal the edges. Then, apply a thin second layer of mud or color. When you pull the tape off, the underlying basecoat creates a crisp line.
- Mimicking Plaster Walls: For a subtle minimalist look, apply the Joint compound very thinly. Drag your trowel across the surface in random arcs. This creates the soft, mottled texture found on expensive Ombre Wall finishes. It adds huge value to your Home.
Incorporating Color Matching
Professional Interior Design relies on color cohesion. You can ensure your canvas art blends perfectly.
- Color Matching: Get a small sample pot of your house paint color. Mix a tiny bit into your Joint compound or use it as a final wash. This ties the artwork to your existing walls, like near Windows or a Mudroom Locker.
- Two-Tone Effect: Use a slightly darker color for the deepest part of the texture. Use a slightly lighter color for the top layer. This contrast increases the dimension of the piece.
Safety and Clean-Up
Safety guidelines are non-negotiable for DIYers. Proper clean-up protects your home and tools.
Essential Safety Guidelines
Following these guidelines keeps your project fun and safe.
- Hand Protection: Wear gloves when handling plaster and chemicals like the sealant. These materials can irritate your skin.
- Air Quality: When spraying primer or sealer, step outside or into a very well-ventilated garage. Always follow the product label directions.
Proper Clean-Up Procedures
Never flush texture medium down your drain. It will harden and clog your pipes.
- Bulk Disposal: Scrape all excess mud or plaster off your Putty knife and tools. Wipe it onto newspaper or cardboard. Let the waste dry completely, then throw it in the trash.
- Tool Care: Immediately wash all your small paintbrushes, mixing containers, and trowels with soap and water. Do not let the mud set on your tools.
Advanced Layering Materials
While we focused on the most accessible materials, professional artists sometimes use specific products. These options give you more control over the final texture.
Alternative Texture Bases
- Lightweight Spackle: For very small DIY projects or detailed areas, use spackle (or spackle). It’s similar to Joint compound but lighter. It’s easy to find and works great for adding small raised areas of texture.
- Heavy Gesso: Gesso is primarily a primer, but a heavy-bodied acrylic Gesso can be used for thin layers of texture. It is a professional-grade alternative favored by many fine artists.
Display and Lighting
The final placement of your statement piece is key to making the texture truly shine.
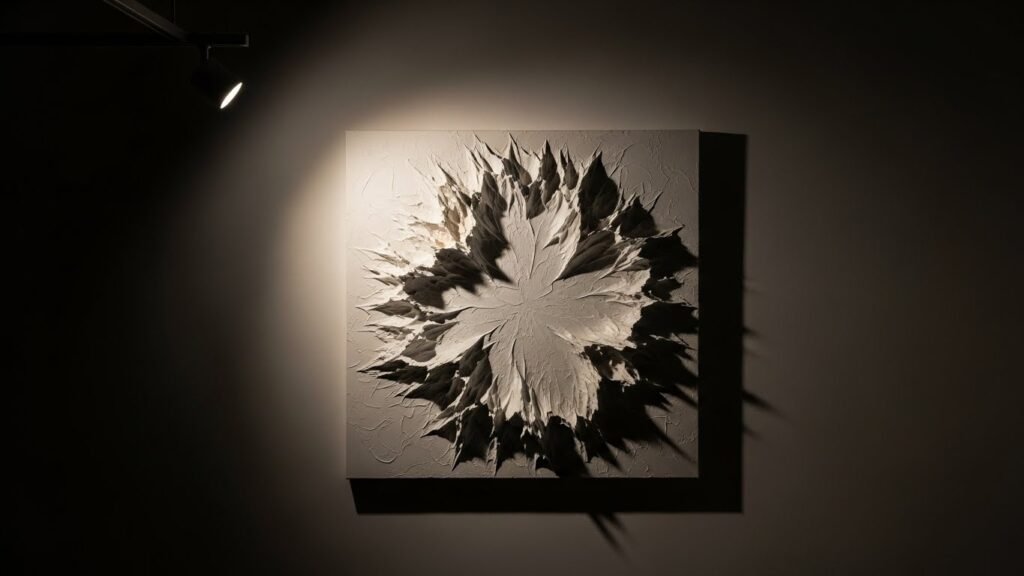
- Lighting Effects: Directional lighting is a game-changer. Hang your canvas art where a spotlight or recessed light can hit it from an angle. This highlights the shadows and the shimmer of any metallics.
- Placement: Brief suggestions on where to hang the final piece (e.g., above a Windows area, in a gallery wall arrangement, or as a focal point statement piece).
Conclusion and Final Tips
You have all the knowledge now to create incredible Textured Canvas Art. This DIY project is easy, inexpensive, and provides the most impactful design solutions for your Home Renovation.
Long-Term Care and Protection
- Maximum Protection: After the artwork is fully cured and sanded, apply a final sealant. A liquid sealer (like matte poly) brushed on provides the best protection against moisture and dust.
- Finish: Remember the sealer will darken the color slightly. This often makes the metallics and deep textures look richer.
- Framing: Mounting your finished canvas art in a wood frame or floating frame gives it that professional gallery finish. It transforms your easy DIY into a high-value statement piece.
Go ahead, try this tutorial. It’s time to fill those walls with amazing texture!
Frequently Asked Questions (FAQs)
Can I use regular house paint instead of acrylic paint for coloring the texture?
Yes, absolutely! House paint works great, especially flat or matte finishes. You can mix it directly into the Joint compound for a custom color or use it as a thin top wash over the dried texture. This is a cheap and easy way to match your existing Interior Design scheme.
Can I apply the texture directly onto a poster board or heavy card stock?
It is not recommended for large dimensions. The weight and moisture from the mud will likely cause the paper or cardboard to warp and buckle. Always stick to a stretched canvas or wood planks for best results and long-term stability.
Is there a minimum dry time I must wait before sanding the Joint Compound?
Yes, you must wait until the Joint compound is completely fully cured. Depending on the thickness of the layering, this usually takes a minimum of 24 hours. If it feels cool to the touch or soft, it is not ready and will just tear when you apply sandpaper.
How do I store leftover Joint Compound or Plaster of Paris?
For Joint compound (pre-mixed mud), seal the container tightly to prevent air exposure and keep it from drying. For Plaster of Paris powder, keep it in an airtight container in a cool, dry place away from any moisture to prevent it from accidentally setting.
What is the best way to clean my hands after using plaster?
Wash your hands immediately with warm water and soap. Do not scrub hard, as the fine plaster powder can be abrasive. Because plaster can dry out your skin, it is a good idea to wear gloves during the process.
How do I create deep cracks intentionally for a distressed look?
To intentionally create deep cracks, you need to violate the normal rules. Apply the Joint compound in a very thick layer (over 1/2 inch) and use a heat gun or hair dryer on a high setting. The rapid, forced drying process will shrink the compound unevenly, resulting in dramatic, deep cracks.
Can I use different textures on the same canvas?
Absolutely! Artists often use this technique for visual interest. For instance, you could use smooth Joint compound on the perimeter and then fill the center with a much Coarser, grainier texture using plaster or a scraping tool.
My texture keeps pulling up from the canvas when I try to etch it. What am I doing wrong?
This happens if the canvas wasn’t properly primed, or if you applied the texture too thinly. Ensure you have a solid base layer that is firmly adhered to the surface. Alternatively, try lifting your Putty knife or scraping tool more quickly, which can help prevent drag.
How do I achieve a circular or swirled pattern?
Use your fingers or a large, round palette knife. Apply the mud loosely. Then, starting from the center, gently rotate the tool outwards in a spiral motion. This creates a mesmerizing, organic texture for your DIY statement piece.
Is it necessary to wear gloves while applying the Joint Compound?
While Joint compound is non-toxic, it can dry out your skin and is difficult to wash out of fingernails. Wearing gloves protects your skin and keeps your hands clean during the process.
I accidentally got some texture on my wood frame. How do I clean it?
If the mud is still wet, wipe it off immediately with a damp paper towel. If it is fully cured, gently use a utility knife or a chisel to scrape the bulk of the texture off the wood frame. Use sandpaper to smooth any remaining residue before re-staining the frame.
What is the benefit of adding a color wash (diluted paint) instead of just painting the top layer?
A diluted color wash seeps into the deep crevasses and grooves of the texture. This instantly enhances the dimension and shadow play, making the raised areas pop. A solid paint coat just covers the texture.
Can I use regular spray paint to color the finished artwork?
Yes, spray paint is a fantastic option. It provides a very thin, uniform coat that covers all the little ridges without filling in the textures. Just ensure you apply it in light, even coats and work in a ventilated area.
My Plaster of Paris cured with a slight yellow tint. Why did this happen?
This usually means the water you used wasn’t completely clean, or there were impurities in the plaster powder. Always mix it with clean, filtered water if possible. The tint can be fixed by applying a final top layer of white acrylic paint or primer.
Does the final sealant protect the artwork from sunlight/fading?
Only if you choose a sealant that explicitly states it has UV protection. A regular clear sealant or matte poly primarily protects against moisture and scratching. Look for UV-resistant varnish options for pieces hanging in direct sunlight.
Can I use metallic leaf (like gold leaf) instead of metallic paint?
Yes, gold leaf and other metallic leafing can be stunning! Apply the metal leaf over a thin layer of size (an adhesive). The uneven texture will make the metallic finish look aged and unique, providing incredible shimmer.
How do I incorporate Ombre effects into the texture?
Create an Ombre effect by applying your final thin coat of mud or spackle and keeping a damp brush and two different color mixes nearby. Apply the dark color to the bottom, the light color to the top, and continuously blend the wet materials in the middle with a clean, wet paintbrush.
What is the best way to light my textured art to maximize the effect?
Use directional lighting. Recessed spotlights or track lighting should be positioned to shine light across the surface from the side. This emphasizes the shadows and highlights created by the texture, maximizing the dimension of your statement piece.
Should I use a gloss or matte sealer for my finished artwork?
For highly textured art, a Matte sealer is typically recommended. Gloss sealers can create distracting reflections. The matte poly allows the natural shadows and the feeling of the texture to dominate, which is usually preferred in Interior Design.
I want to make a huge piece (e.g., 60×40 inches). Should I still use a stretched canvas?
For very large dimensions, a traditional stretched canvas may sag under the weight of the mud. Consider using a thick wood planks panel or a custom-built, rigid wood frame with a plywood backing to ensure your artwork remains flat and stable over time.