Choosing a new floor for your bath can be a real headache. You want something that looks killer but won’t break the bank. Many folks are looking at vinyl flooring in bathroom pros and cons these days. It is a super popular choice for modern home makeovers. Vinyl has come a long way from the old sheets in your grandma’s house. Now we have high-end planks that look just like real wood. This guide will help you balance the cost and the looks. We want to make sure you pick a floor that stays pretty for years.
Pros of Vinyl Plank Flooring
Vinyl is a tough material that can handle a lot of mess. It is a great pick for bathroom jobs because it lasts a long time. You get a lot of bang for your buck with this stuff. It looks great and works hard in your home.
Affordable Luxury and Budget-Friendliness
One of the best things about vinyl is the price tag. It is much cheaper per square foot than real hardwood or stone. You can get that fancy look without spending all your savings. It helps you stay on track with your budget during a big remodel.
- Lower Material Costs: You will pay way less for the planks themselves compared to tile.
- Cheap Installation: You do not need to hire a pro for weeks to get it done.
- High-End Vibes: Your friends will think you spent a fortune on the design.
Versatile Design and Aesthetic Options
The tech used to make these planks is pretty wild now. They can look exactly like real oak, marble, or even cement. You can find almost any color or size you want at the store. It is a smart way to get the look of pricey stuff with none of the hassle.
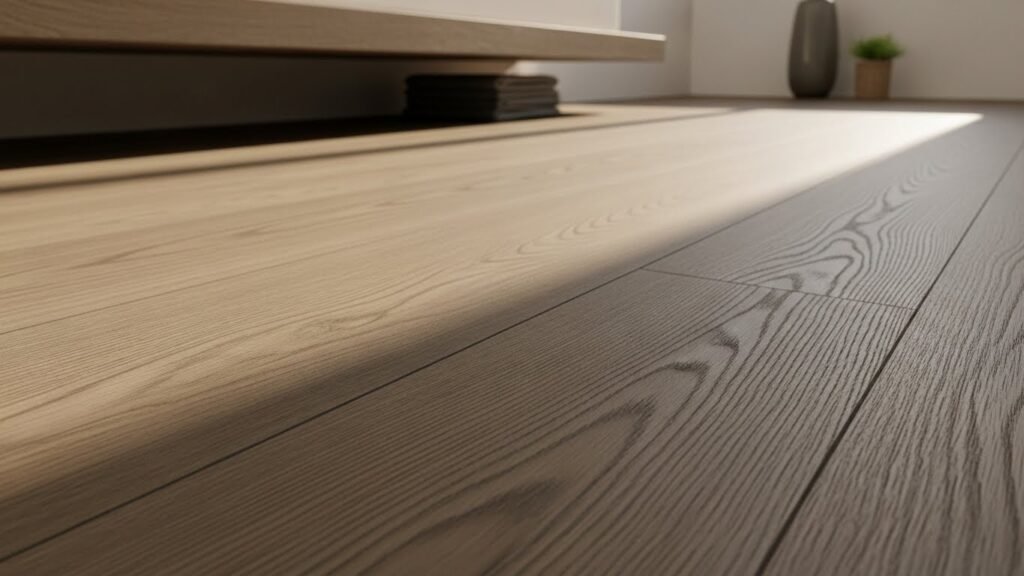
- Realistic Textures: Many planks have grains you can actually feel under your feet.
- Huge Variety: There are thousands of patterns to match your own style.
- Material Mimicry: It blends the beauty of nature with the strength of plastic.
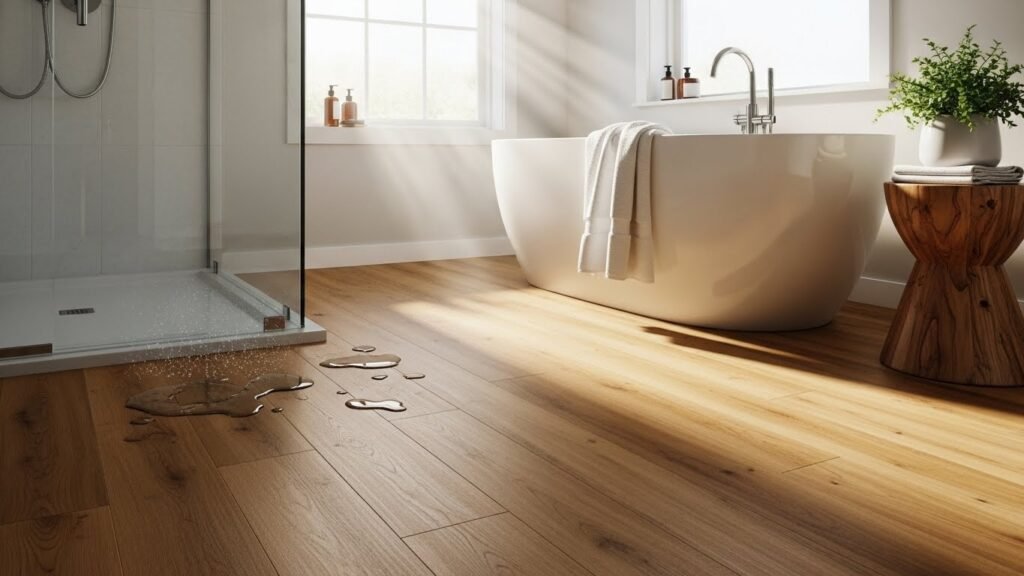
Water Resistance and Moisture Protection
Bathrooms are wet places, and vinyl loves that. It is much better at handling water than wood or laminate. It keeps moisture from soaking into your subfloor and causing rot. This is why it is perfect for rooms with showers and tubs.
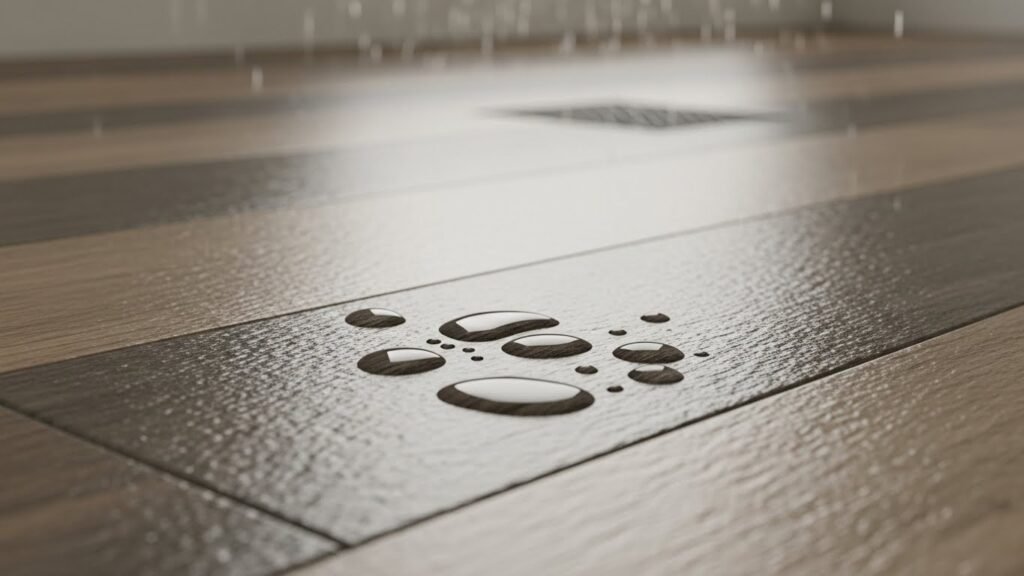
- Waterproof Core: Most modern planks will not swell if they get soaked.
- Mold Prevention: Since it does not hold water, it helps keep your air clean.
- Spill Protection: You can splash all you want and just wipe it up later.
Comfort and Insulation
Tile can feel like ice on a cold winter morning. Vinyl is much warmer and softer on your toes. It acts as a shield against the cold coming from the ground. It is also much better if you have to stand for a long time.
- Soft Underfoot: There is a bit of give to the material that feels nice.
- Warm Surface: It stays closer to the room temp than stone does.
- Quiet Walk: It helps dampen the sound of footsteps in the house.
Low Maintenance and Ease of Cleaning
You probably have better things to do than scrub floors. Vinyl is very easy to keep looking new. You don’t need to seal it or sand it down ever. Just a quick sweep and a damp mop will do the trick.
- No Special Chemicals: Most mild soaps work just fine on the surface.
- Stain Resistance: It fights off spills from makeup or soap very well.
- Daily Cleaning: A simple broom is usually all you really need.
DIY-Friendly Installation
If you like doing things yourself, this is your floor. The click-lock system is like putting together a puzzle. You can put it right over your old floor in many cases. You don’t need any messy glue or big saws for the job.
- Floating Floors: The planks just sit on top without being nailed down.
- Save on Labor: You can do a whole bathroom in just one afternoon.
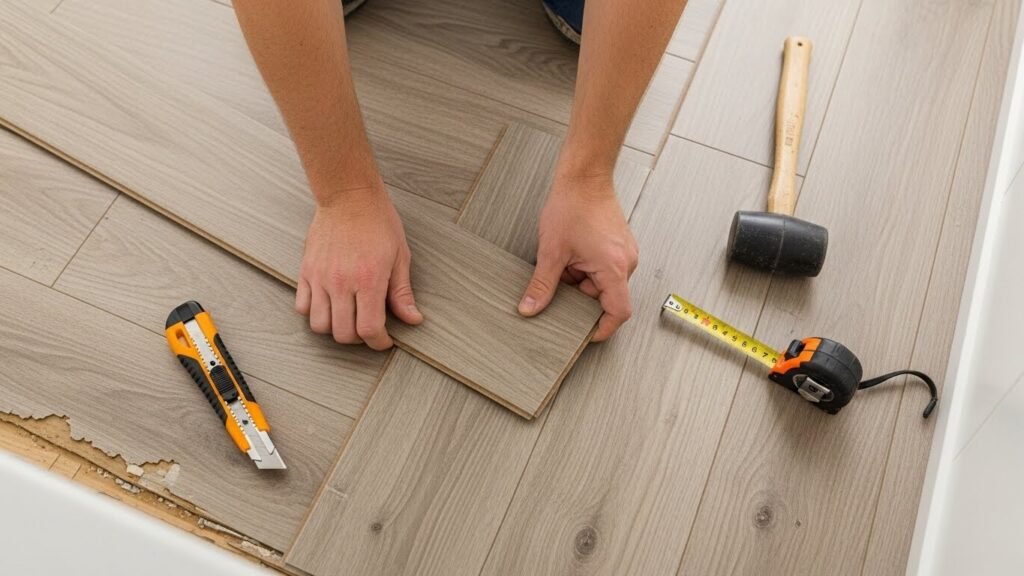
- Simple Tools: A utility knife and a rubber mallet are often enough.
Cons of Vinyl Plank Flooring

Nothing is perfect, even if it looks awesome. You need to know the bad parts of vinyl flooring in bathroom pros and cons too. This helps you avoid a big mistake in your renovation.
Difficulty of Removal
Putting it in is easy, but taking it out can be a nightmare. This is mostly true if you use the glue-down kind. It can cost a lot of money to pay someone to scrape it off. You might end up damaging the floor underneath if you aren’t careful.
- Sticky Mess: The adhesive used is meant to stay forever.
- Labor Intensive: It takes a lot of elbow grease to get every bit up.
- Subfloor Prep: You have to spend hours cleaning the floor before a new one goes down.
Vulnerability to Punctures and Dents
Vinyl is soft, which is a pro and a con. Sharp things like dropped scissors can poke holes in it. Heavy cabinets can leave big dents that never go away. You have to be careful when moving things around the room.
- Object Damage: Dropping a heavy tool can ruin a plank instantly.
- Furniture Weight: You need to use pads under heavy items to protect the floor.
- Permanent Marks: Once it is dented, you usually have to replace the whole plank.
Surface and Top Coat Limitations
The top layer of vinyl can be a bit weak sometimes. Some brands don’t handle the sun very well and will fade. If your bathroom has a huge window, the floor might change color. The protective coat can also wear thin over many years.
- Sun Fading: UV rays can make the pretty patterns look washed out.
- Wear Layer: Not all vinyl is made with a thick top coat.
- Limited Life: It won’t last 50 years like real tile or stone will.
Environmental Impact and Health Concerns
Vinyl is basically a big piece of plastic. It won’t break down in a landfill for a very long time. Some cheap versions can also leak smells into your home. This is a big deal for folks who want a green house.
- Non-Biodegradable: It stays in the ground forever once you toss it.
- VOC Issues: Some planks release chemicals that can be bad for your air.
- Hard to Recycle: Most local centers won’t take old vinyl flooring.
Impact on Home Resale Value
While it looks nice, it doesn’t add much value to your house. People who buy homes still want to see real tile or wood. It is seen as a budget choice rather than a luxury one. You won’t get back as much money when you sell your place.
- Market Perception: Buyers might think you cut corners on the remodel.
- Low Appreciation: The value stays flat compared to real stone.
- Temporary Feel: Some people think of it as a quick fix rather than a permanent floor.
Design DOs and DON’Ts for a Professional Look
Making a floor look high-end is all about the design choices. You want your vinyl flooring in bathroom pros and cons to lean toward the pro side. Following a few simple rules will keep your home looking sharp.
The Rule of Flow Integrity
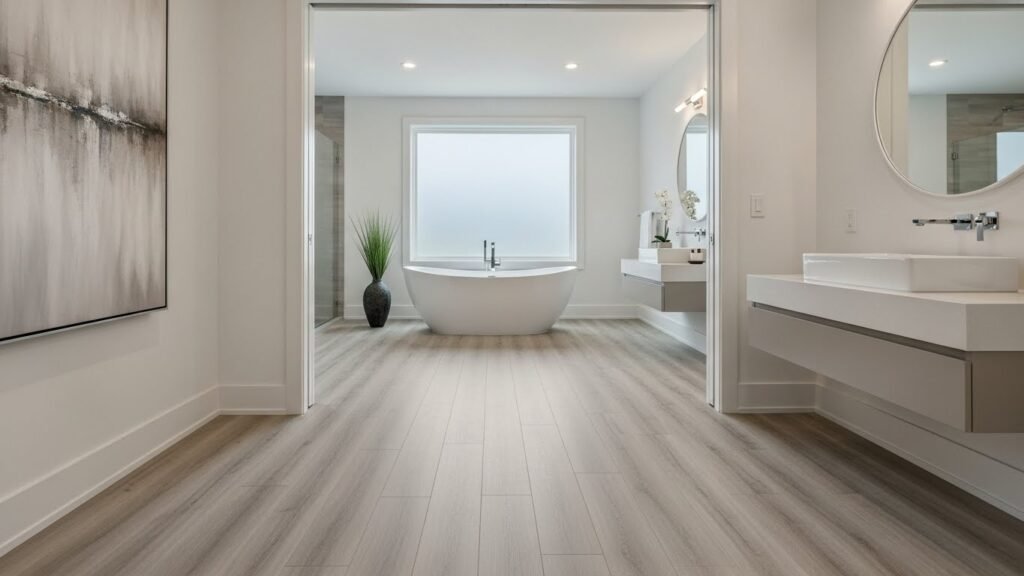
Your house should feel like one big connected space. It looks best when the wood look flows from the hall into the bath. If you switch materials at the door, it can look a bit choppy. Avoid LVP if you have to jump from carpet to a small patch of vinyl.
- Continuous Flow: Try to use the same floor in the bedroom and the master bath.
- Avoid Choppiness: Too many different floors make a house feel smaller.
- The Carpet Problem: Transitioning from soft carpet to vinyl can look cheap.
Managing Material Clashes
Never put fake wood right next to real wood. It makes the vinyl look very fake and bad. It is almost impossible to match the colors perfectly. Choose a floor that looks different enough so they don’t fight.
- Visual Competition: The real wood will always make the vinyl look worse.
- Color Clashing: The undertones will likely be off and look weird.
- Design Strategy: Use a different style like stone-look if it touches a wood hall.
Color and Trend Selection
Stay away from the grey floor trend if you can. It is starting to look dated and doesn’t look like real wood. Avoid planks that look too distressed or have fake scratches. These patterns repeat too often and look like a print job.
- Natural Tones: Stick to warm browns or soft whites for a timeless look.
- Repeated Patterns: Watch out for “skunk lines” where the same plank repeats.
- Simplicity Wins: The less busy the floor is, the better it will look.
Choosing for Longevity
Select a smooth pattern that doesn’t scream for attention. Quiet floors stay in style much longer than bold ones. You want a floor that will still look good if you change your paint. Think about how the floor will look in ten years, not just today.
- Quiet Designs: Low-pattern planks are more versatile for decor.
- Smooth Surfaces: These are easier to clean and look more modern.
- Future Proofing: Pick a color that works with many different styles.
Technical Considerations and Product Selection
Not all vinyl is created the same way. You need to know the tech specs to get the right one for you. This part of the vinyl flooring in bathroom pros and cons is very important for durability.
Material Composition: SPC vs. Rigid Core
SPC stands for stone plastic composite, and it is very tough. It has a core that won’t dent as easily as the cheap stuff. Rigid core is great for bathrooms because it stays flat over time. It is a bit more expensive but worth it for high-traffic spots.
- Durable Core: SPC is the best choice for resisting heavy dents.
- Stability: These planks won’t warp if the temp changes a lot.
- Impact Resistance: Better for families with kids or big pets.
Safety and Accessibility
Vinyl is often safer than tile because it isn’t as slippery. Many brands have a texture that helps your feet grip the floor. This is a big win if you are planning to live in your home as you get older. It is much softer if someone happens to take a fall.
- Slip Resistance: Look for planks with a high safety rating for wet areas.
- Aging in Place: It is a smart choice for seniors who want to avoid slips.
- Softer Landings: The material has a bit of cushion compared to hard stone.
When to Opt for Traditional Tile
Sometimes vinyl just isn’t the right answer. In a fancy powder room, a classic tile might look much better. If you can’t make the floor flow with the rest of the house, go with tile. It is the safer bet for a high-end professional design.
- Powder Rooms: These small spaces can handle a more expensive tile.
- Traditional Styles: If your house is very old, tile might fit the vibe better.
- Architectural Fit: Match the floor to the era of your home.
Comparison Table: Vinyl vs. Tile
| Feature | Vinyl Plank (LVP) | Ceramic/Stone Tile |
| Cost | Low to Medium | High |
| DIY Ease | Very Easy | Hard |
| Warmth | Warm | Cold |
| Durability | Good | Excellent |
| Resale Value | Low | High |
Step-by-Step DIY Installation Guide for Bathroom Vinyl Floors
Installing vinyl plank flooring is a popular weekend project because the click-lock system is like putting together a puzzle. It is a smart way to get the look of pricey materials with none of the hassle.
Preparation and Tools
Before you start, gather the simple tools required for the job to ensure the process goes smoothly.
- Utility Knife: Used for scoring and cutting the planks to the correct length.
- Rubber Mallet: Necessary for tapping the click-lock joints together securely.
- 100% Silicone Caulk: Used to seal the edges near the tub or shower to prevent water from running under the planks.
- Measuring Tape: Essential for calculating the expansion gap and plank layout.
- Self-Leveling Compound: If your subfloor is uneven, use this to create a flat surface before you begin.
Step 1: Subfloor Readiness
Vinyl planks require a very flat surface; otherwise, the click-lock joints may break over time.
- Clean the Area: Remove all dust, hair, and grit from the subfloor to ensure the planks sit flat.
- Level the Floor: Check for any dips or bumps; use a leveling compound if the surface is not perfectly even.
- Plan for Vanities: It is usually best to install the bathroom vanity first and then lay the floating floor around it.
- Note on Old Floors: In many cases, you can install vinyl right over your old floor if it is flat and in good condition.
Step 2: Layout and Planning
Proper planning prevents “choppiness” and ensures the floor flows naturally into the room.
- Maintain Flow: Try to run the planks in the same direction as the flooring in the hallway or bedroom to create a continuous look.
- Expansion Gap: Leave a small gap around the perimeter of the room to allow the floor to expand and contract with temperature changes.
- Check the Pattern: Look at the planks before installing to avoid “skunk lines” where the same pattern repeats too closely together.
Step 3: Installing the Planks
Most modern luxury vinyl planks use a floating floor method, meaning they sit on top without being nailed or glued down.
- Start at a Wall: Begin laying the first row against a long wall, ensuring the click-lock tongue faces out.
- Click and Lock: Angle the next plank into the previous one and press down until it clicks.
- Use the Mallet: Gently tap the seams with a rubber mallet to ensure the joints are tight and waterproof.
- Cut to Fit: When you reach the end of a row, score the plank with a utility knife and snap it to the correct length.
Step 4: Finishing Touches in the Bathroom
The final steps are critical for protecting the floor from the high moisture levels found in bathrooms.
- Seal the Edges: Apply a bead of 100% silicone caulk around the bathtub and shower to prevent water from seeping underneath.
- Add Trim: Install baseboards or shoe molding to cover the expansion gap while still allowing the floor to move.
- Walk on it Immediately: Since there is no glue to dry with a click-lock floor, you can use the bathroom right away.
If you are installing over a radiant heating system, check the manufacturer’s temperature limits first to ensure the heat does not warp the synthetic material.
Maintenance Schedule for Vinyl Bathroom Floors
Maintaining your vinyl plank flooring is simple because the material is designed to handle mess and last a long time. Since it does not require sanding or sealing, you can keep it looking new with very little effort.
Daily Maintenance: Quick Surface Care
Daily care is focused on removing debris that could cause scratches over time.
- Sweep or Dust Mop: Use a simple broom or microfiber mop daily to remove hair, dust, and grit.
- Spot Clean Spills: Immediately wipe up any splashes from water, soap, or makeup to prevent potential slipping or film buildup.
- Avoid High Heat: Ensure hair straighteners or curling irons are not placed directly on the floor, as extreme heat can damage the synthetic surface.
Weekly Maintenance: Deep Cleaning
Once a week, perform a more thorough cleaning to maintain the floor’s shine and hygiene.
- Damp Mopping: Use a damp mop with warm water; because the core is waterproof, the planks will not swell if they get wet.
- Use Mild Cleaners: Use mild soaps or cleaners specifically labeled for vinyl; avoid harsh chemicals that could strip the protective wear layer.
- Vacuuming: If you vacuum, ensure the beater bar is turned off to prevent the rotating brush from scratching the top coat.
Monthly and Long-Term Protection
These steps help protect the structural integrity and appearance of your flooring over the years.
- Check Caulking: Inspect the silicone caulk around the bathtub and shower to ensure water is not leaking underneath the planks.
- Furniture Care: If you have heavy cabinets or chairs in the bathroom, ensure they have felt pads underneath to prevent permanent dents.
- Manage Sunlight: If your bathroom has large windows, use blinds during the brightest parts of the day to prevent UV rays from fading the patterns.
- Avoid Steam Mops: Do not use steam cleaners, as the intense heat can eventually weaken the click-lock joints or the adhesive in glue-down versions.
What to Avoid
To ensure your floor lasts its full lifespan, stay away from these common damaging habits:
- Abrasive Tools: Never use steel wool or highly abrasive scrubbing pads.
- Waxing: Do not wax vinyl planks; they have a factory-applied wear layer that provides its own shine.
- Dragging Objects: Never drag heavy bathroom fixtures or furniture across the floor, as this can lead to deep punctures.
Essential Shopping List for Vinyl Bathroom Floors
Keeping your vinyl floors in top shape requires the right tools and cleaning solutions. Using the correct items ensures you protect the waterproof core and the delicate top wear layer.
Cleaning Solutions and Chemicals
Vinyl is low-maintenance, but it can be sensitive to harsh chemicals or wax-based products.
- Mild pH-Neutral Cleaner: Look for a gentle detergent or a specific “Luxury Vinyl” cleaner to keep the surface safe.
- Mild Soap: Most simple, non-abrasive soaps work perfectly for routine sanitizing.
- Warm Water: This is the best base for mopping since vinyl handles water and moisture exceptionally well.
- 100% Silicone Caulk: Use this to seal the gaps between your floor and the bathtub to stop water from reaching the subfloor.
Mopping and Dusting Tools
The goal is to remove grit and dirt without scratching the protective top coat.
- Microfiber Mop: These are ideal because they are soft and effective at picking up dust without scratching.
- Standard Broom: A soft-bristled broom is all you need for daily debris removal.
- Soft Cloths or Sponges: Perfect for quickly wiping up makeup or soap spills to prevent stains.
- Hard-Floor Vacuum: Ensure your vacuum has a “hard floor” setting that turns off the beater bar to avoid damage.
Protection and Prevention Tools
Since vinyl is a softer material, it is prone to dents and punctures from heavy objects or sharp items.
- Furniture Pads: Use felt or rubber pads under heavy bathroom vanities or storage cabinets to prevent permanent dents.
- Walk-off Mats: Place a non-staining mat at the bathroom door to catch grit and sand before it reaches the vinyl.
- Window Tints or Blinds: If you have large windows, these help block UV rays that can cause the floor patterns to fade over time.
- Utility Knife and Rubber Mallet: Keep these on hand if you have a “click-lock” floor, as they are the only tools needed to replace a single damaged plank.
Items to Avoid Buying
To prevent ruining your warranty or the floor’s finish, do not use the following:
- Steam Mops: The extreme heat and moisture can weaken the adhesive or the click-lock joints.
- Abrasive Scrubbers: Avoid steel wool or stiff brushes that can wear down the top layer.
- Wax or Polish: These products will not stick to vinyl and can create a slippery, dull film.
- Beater Bar Vacuums: Rotating brushes are meant for carpet and can leave visible scratches on vinyl.
Conclusion: Is Vinyl Plank Flooring Right for You?
So, there you have it. We looked at all the vinyl flooring in bathroom pros and cons to help you out. It is a fantastic choice if you want a beautiful bath without going broke. You get a floor that is warm, waterproof, and very easy to clean. But you have to remember it might not boost your home’s value much. It can also be tough to remove if you change your mind later.
If you love a good weekend project and want a fresh look, vinyl is for you. Just stick to the design rules like keeping the flow through the house. Avoid those grey and super rustic patterns that will look old fast. Pick a high-quality SPC plank for the best strength. Your bathroom will look like a million bucks, and you will still have money left in your pocket.
Frequently Asked Questions About Vinyl Flooring in Bathrooms
How long does vinyl plank flooring typically last in a high-moisture bathroom?
Most high-quality luxury vinyl planks are designed to last between 10 to 20 years depending on the thickness of the wear layer. In a bathroom setting, their lifespan remains stable as long as water does not seep underneath the planks to damage the subfloor.
Can I install vinyl planks over a radiant heating system?
Yes, many modern vinyl products are compatible with under-floor radiant heating. You must check the manufacturer’s temperature limits to ensure the heat does not warp the synthetic material.
What is the difference between LVP and LVT?
LVP stands for Luxury Vinyl Plank, which mimics the shape and look of wood boards. LVT stands for Luxury Vinyl Tile, which is usually square and designed to look like stone, ceramic, or marble.
Do I need a separate underlayment for bathroom vinyl flooring?
Many luxury vinyl planks come with a pre-attached underlayment for sound dampening and comfort. If your chosen product does not have one, adding an underlayment can help hide small imperfections in the subfloor.
Is it possible to repair a single damaged vinyl plank?
For floating click-lock floors, you can take apart the floor starting from the wall to reach and replace a damaged piece. If the floor is glued down, you may have to carefully cut out the specific plank and scrape the adhesive before installing a new one.
How do I prevent the vinyl planks from buckling in the bathroom?
You must leave a small expansion gap around the perimeter of the room during installation. This allows the floor to expand and contract with temperature changes without pushing against the walls and lifting up.
Is vinyl flooring pet-friendly for bathroom use?
Vinyl is excellent for pets because it is scratch-resistant and very easy to clean if accidents happen. The textured surface also provides better traction for paws compared to slick porcelain tile.
Can I use a steam mop on my vinyl bathroom floors?
It is generally recommended to avoid steam mops because the intense heat and moisture can weaken the adhesive or the click-lock joints. A damp mop with mild detergent is the safest way to sanitize the surface.
What is the best way to seal the edges of vinyl flooring near a bathtub?
You should use a high-quality 100% silicone caulk to seal the gap between the flooring and the tub or shower. This prevents water from splashing off the side and running underneath the planks.
Does vinyl flooring feel cold in the winter?
Unlike ceramic or stone tile, vinyl does not hold the cold, so it stays much closer to the actual room temperature. This makes it more comfortable for bare feet in the morning.
Are there eco-friendly brands of vinyl flooring?
While vinyl is a synthetic plastic, some brands focus on sustainability by using recycled materials and ensuring the product is 100% recyclable at the end of its life. Look for certifications like FloorScore to ensure low chemical emissions.
Can I use vinyl planks on the walls of my shower?
No, vinyl planks are designed specifically for flooring and should not be used as a waterproof wall covering in a shower. They are water-resistant on the surface but are not meant to handle the constant direct pressure of a showerhead.
How thick should the wear layer be for a bathroom?
For a residential bathroom, a wear layer of 12 mil is usually plenty, but 20 mil is better if you want maximum protection against scratches and dents.
Can I use a vacuum with a beater bar on vinyl?
You should turn off the beater bar or use a vacuum designed for hard floors to avoid scratching the protective top coat. Simple suction is usually enough to remove hair and debris.
Does vinyl flooring help with bathroom noise?
Yes, the resilient nature of vinyl and its underlayment help absorb sound, making the bathroom less echoey than if it had hard tile.
Will sunlight from a bathroom window cause the floor to peel?
Direct sunlight usually causes fading rather than peeling. Using window tints or blinds during peak sun hours can protect the color of your planks.
Can I put a heavy vanity on top of a floating vinyl floor?
It is usually best to install the vanity first and then lay the floating floor around it. If you put a heavy vanity on top of a floating floor, it can pin the planks down and prevent them from expanding, which leads to buckling.
What should I do if my subfloor is uneven?
Vinyl planks require a very flat surface; otherwise, the click-lock joints may break over time. You may need to use a self-leveling compound to smooth out the subfloor before installation.
Is luxury vinyl flooring fire-resistant?
Vinyl is generally flame-resistant and will not easily catch fire, but it can be damaged or melted by high heat or dropped hair tools.
How soon can I walk on the floor after installation?
If you installed a floating click-lock floor, you can walk on it and move furniture back in immediately. For glue-down floors, you typically need to wait 24 to 48 hours for the adhesive to fully cure.