
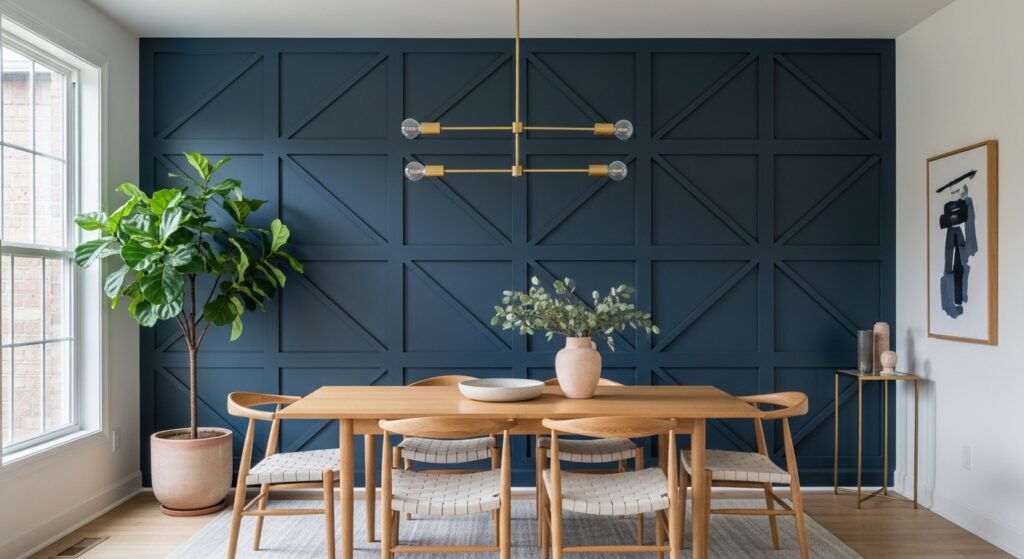
A geometric accent wall is the best way to change a boring room. It turns a flat wall into a 3D version of art. You do not need to be a pro to do this. This project uses repeating lines to make your home look expensive. It is much better than just using a new paint color. You can do this in a single weekend for around seventy dollars. It adds a moody feel to any main bedroom or dining room.
Introduction to Geometric Wood Walls
A geometric accent wall uses wood trim to create patterns. It is different from standard wall paneling because it uses many angles. Most people use pre-primed MDF or pine boards for this. These boards create shadows that make the wall pop. You can choose a simple grid or a wild, random pattern. This project is perfect for beginners who want to try woodworking. It is a low-cost way to boost your home value.
Defining the Geometric Accent Wall
This wall is a 3D version of a standard painted design. You are adding physical texture to the room. The wood trim creates depth that paint cannot match. It makes the space feel more high-end and custom. Most designs skip the basic 90 degree angles for something fresh. You can build a look that is totally unique to your house.
The Impact of Wood Trim
Wood trim adds a sense of architecture to a plain room. The repeating lines guide the eye across the space. Texture changes how light hits the wall during the day. It can make a small room feel much taller or wider. Adding wood trim is a classic carpentry trick for home renovation. It gives your dining room a very sophisticated look.
Project Feasibility
You can finish this project in less than 24 hours. It usually costs between seventy and one hundred dollars. You only need a few basic power tools like a miter saw. Most of the work is just measuring and nailing. It is a great Saturday project for any DIY fan. Even if you have never used a nail gun, you can do this.
Pre-Project Planning and Inspiration
Good planning is the secret to a great geometric accent wall. You need to know your style before you buy wood. Some people like clean lines, while others want chaos. Look at photos online to see what fits your furniture. Think about how the lines will hit your bed or table. Planning prevents you from wasting expensive trim boards.
Finding Your Style
- Pinterest inspiration is a great place to start your search.
- Modern styles often use very thin boards and random angles.
- Traditional styles might use a more uniform pattern or grid.
- Moody vibes work well with dark colors like Sherwin Williams Peppercorn.
- Minimalist looks use fewer boards with even spacing.
The Power of Sketching
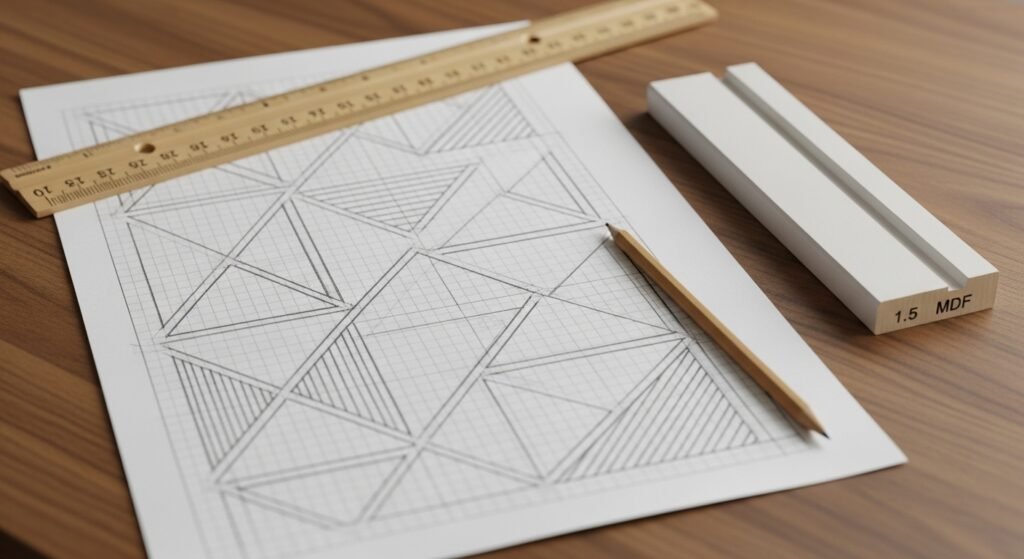
Always draw your design tweaks on paper first. A sketch helps you see if the lines look busy. You can figure out your layout before touching the wall. It helps you count how many boards you need to buy. You can change your mind on paper for free. Sketching makes the construction phase much faster and easier.
Color Theory
Dark colors make the geometric accent wall look very professional. A moody gray or deep blue adds drama to the room. Light colors make the pattern look subtle and airy. Using an eggshell finish helps the light catch the edges. Make sure the color matches your existing home decor. The paint color should be consistent across the wall and trim.
Advanced Design Principles for Large Walls
- Scale and proportion matter when you have a very tall ceiling.
- Avoid clutter by keeping the design simple on small walls.
- Balance the room by centering the main pattern behind the bed.
- Use triangles to create a sense of movement and energy.
Symmetry vs. Asymmetry
Symmetrical designs feel very calm and organized. Asymmetrical designs feel modern and artistic. A random geometric accent wall is often easier to build. You do not have to worry about every side being perfect. Symmetrical walls require very exact measurements to look right. Choose the one that matches the energy of your home.
Focal Point Integration
Your wall should highlight the best part of the room. This is usually where the bed or the dining table sits. Make sure the lines do not clash with your furniture. You can design the pattern to frame a piece of art. This makes the wall feel like it was built for the room. It creates a custom look that builders usually charge a lot for.
Essential Tools and Materials
Having the right gear makes this DIY project a breeze. You will need both hand tools and power tools. Buying pre-primed material saves you a lot of time. Make sure you have enough sawhorses to hold your wood. Good tools ensure your miter cuts are clean and tight. Always keep your air compressor ready if using pneumatic tools.
Selecting Your Trim
- Pre-primed MDF is smooth and very easy to paint.
- Trim boards with a factory round over look very professional.
- Primed pine is stronger than MDF and handles moisture well.
- 1 1/2″ widths are the standard choice for most accent walls.
- MDF dust can be messy, so always use proper PPE.
Adhesives and Fasteners
- Liquid nails provide a permanent bond to the drywall.
- 1 1/2″ nails are the perfect length for trim boards.
- Wood glue helps keep the miter joints from opening up.
- Construction adhesive is a must for boards that miss a stud.
Required Power Tools
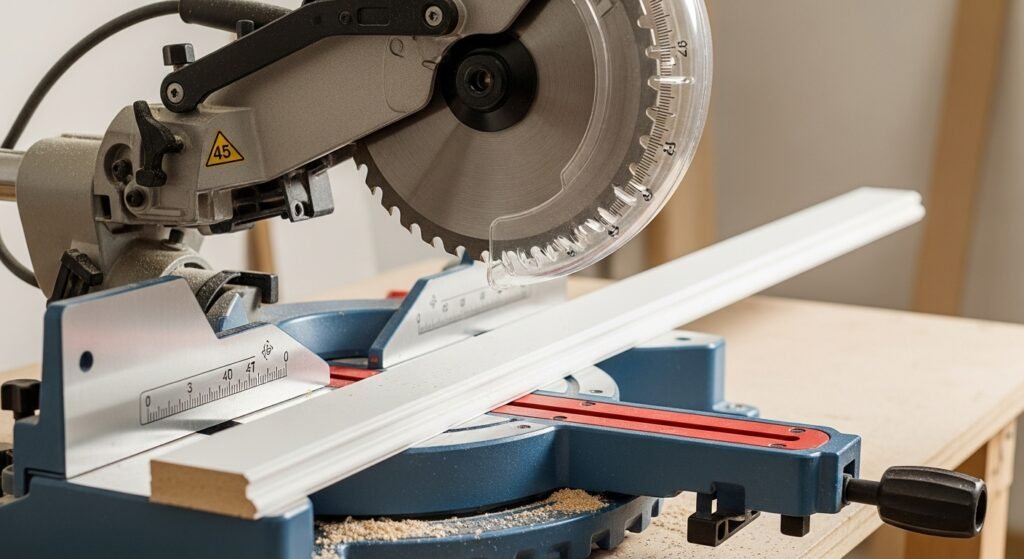
A miter saw is the most important tool you will use. It allows you to cut angles with extreme precision. A brad nailer makes the installation go very fast. You can use a pneumatic nailer or a battery operated nailer. A miter box is okay but much slower than a saw. Power tools give you the crisp lines you see in magazines.
Measurement and Layout Tools
- Stud finder helps you find a secure hold for your nails.
- Combination square ensures your 90 degree angles are perfect.
- Painter’s tape lets you map the pattern without marking the wall.
- Square layout tool is great for checking your triangle geometry.
- Measuring tape should be used for every single cut.
Finishing Supplies
- Spackling is needed to hide every single nail hole.
- 220 grit sandpaper smooths out the rough edges of the wood.
- 440 grit sandpaper gives the wood a polished feel before paint.
- Foam roller provides a smooth finish without brush marks.
- Paintable caulk fills the gaps where wood meets the wall.
Specialized Hardware for Precision
- Digital angle finders help with walls that are not square.
- Laser levels keep your long horizontal lines perfectly straight.
- Clamps can hold boards in place while the glue dries.
- Angle gauges make it easy to replicate the same cut many times.
Wall Preparation and Baseboard Modification
You cannot just start nailing boards to a dirty wall. Proper prep work makes the final result look like a pro did it. You might need to change your baseboards for a flush mount. Painting the wall first is a smart move. It saves you from painting around the trim later. Take your time here so the rest of the job is easy.
Clearing the Canvas
Start by removing everything from the wall. This includes outlet covers and any old nails. You want a flat surface for your geometric accent wall. If the wall is dirty, give it a quick wipe down. This helps the liquid nails stick better. A clean wall means a much better finished product.
The Square Top Solution
- Baseboard removal is usually necessary for a clean look.
- Rectangle design baseboards allow the trim to sit flush.
- Flush mount means there are no awkward gaps at the floor.
- Simple trim often looks better with complex geometric patterns.
Base Paint
Paint the wall your chosen color before you install any wood. It is much easier to roll a flat wall than to paint around trim. Use a high-quality paint like Sherwin Williams Peppercorn. Let the paint cure for at least a few hours. This ensures the painter’s tape does not peel the paint off. You will only need to do touch-ups at the end.
Addressing Wall Imperfections
- Bowed studs can make the boards look crooked.
- Wall texture might need to be sanded if it is too thick.
- Large holes should be patched before you start your layout.
- Uneven corners require extra caulk during the finishing phase.
Mapping the Design on the Wall
Mapping is where your geometric accent wall comes to life. Do not guess where the boards go. Use tape to see the pattern in real time. This is the best way to catch mistakes early. It also helps you see if you like the spacing. Mapping is the bridge between your sketch and the actual wood.
The Tape Template Method
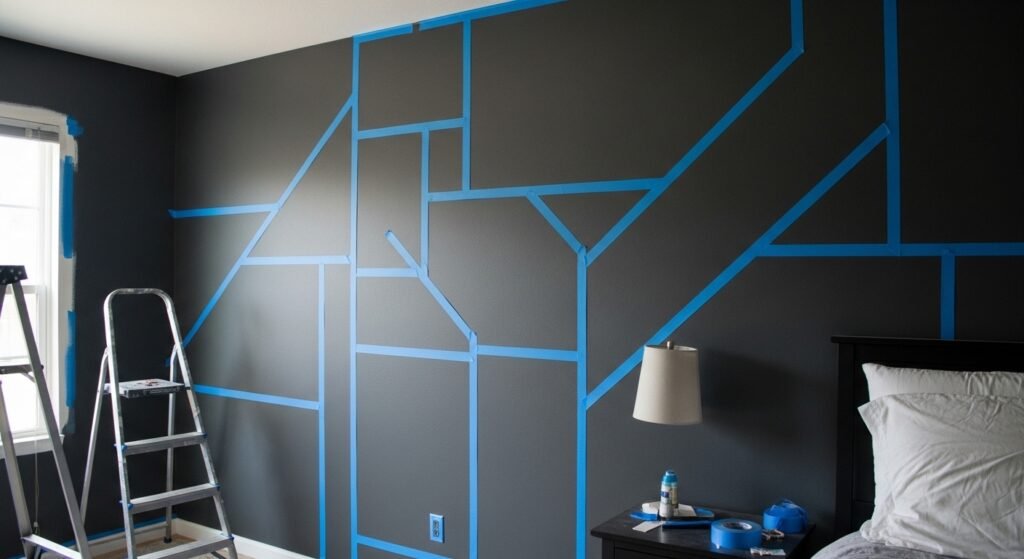
Use painter’s tape to act as your “fake” wood trim. Buy tape that is the same width as your boards. Stick it to the wall to create your uniform pattern. If you do not like a line, just peel it off and move it. This saves you from making bad cuts with the miter saw. It gives you a visual guide for the whole project.
Calculating Material
- Measure every tape line to find the total length of wood needed.
- Add ten percent to your total to account for mistakes.
- Check board lengths to make sure they can span your longest lines.
- Count the joints to know how much wood glue you will use.
Marking Stud Locations
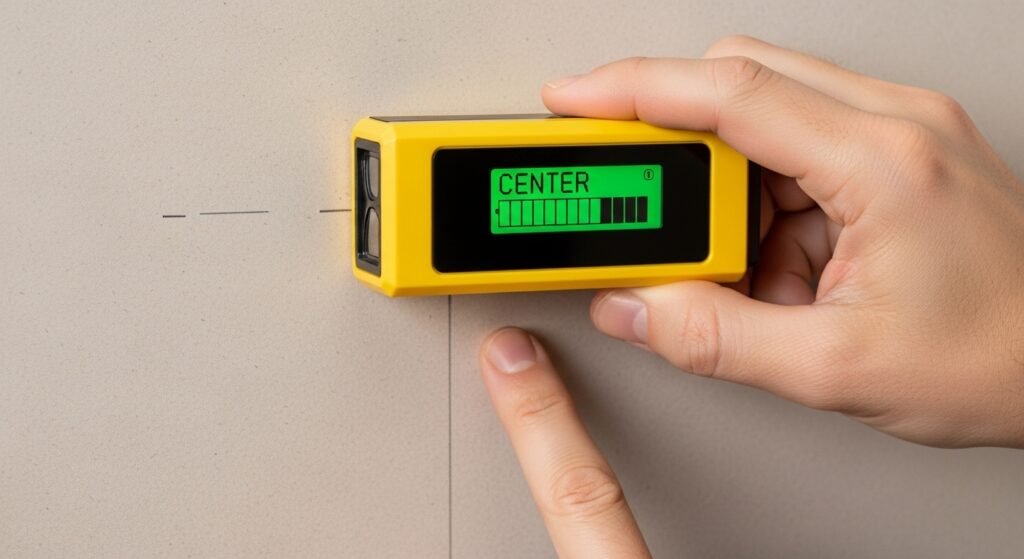
- Stud finder use is vital for a secure hold on the wall.
- Reference lines should be drawn from the ceiling to the floor.
- Mark the studs clearly so you know where to fire the nail gun.
- Nailing into studs prevents the boards from falling off later.
The Starting Anchor
Choose a corner to be your starting point. Many people start at the top right. This gives you a solid 90 degree angle to build from. It acts as an anchor for the rest of your calculations. Once the first piece is up, the rest of the pattern follows. Starting correctly is the key to a snug fit.
Mastering Geometry and Angles
You do not need to be a math genius for this project. Most of the angles are very simple. A geometric accent wall relies on triangles and straight lines. Understanding how pieces fit together is the main goal. Use your square layout tool to keep everything consistent. This part of the job requires the most focus.
The 180-Degree Rule
Triangles always have angles that add up to 180 degrees. If you know two angles, you can find the third one. This is helpful when your boards meet at a weird spot. Use a right triangle as the base for many of your shapes. It makes the math much faster during the construction phase. Simple geometry ensures all your joints are tight.
Standardized Angles
- 90 degree angles are the easiest to cut and join.
- 60 degree angles provide a sharp, modern look to the pattern.
- 30 degree angles are great for creating long, thin triangles.
- Consistency is more important than using many different angles.
Avoiding 90-Degree Reliance
Do not be afraid of the miter saw. Moving away from basic squares makes the wall look custom. Modern geometric accent walls use many diagonal lines. It gives the dining room a very high-end feel. Pushing your limits with angles is how you get the best results. Just remember to measure twice before you cut.
Advanced Miter and Bevel Cuts
- Scarf joints help you connect two short boards into one long line.
- Bevel cuts are used if you want the wood to wrap around a corner.
- Compound miters are for advanced users doing complex shapes.
- Testing on scrap wood is the best way to check your saw settings.
The Cutting and Installation Process
Now it is time to cut the wood and put it on the wall. This is the most exciting part of the DIY project. You will see your pattern turn into a real 3D version. Work slowly to ensure every piece has a snug fit. Always wear your safety gear when using the saw. This phase requires patience and precision.
The Longest First Strategy
Install the longest boards across the wall first. These boards create the main structure of your design. It is much easier to fit small pieces into a large frame. Long boards help you keep the overall pattern straight. Secure them well with liquid nails and the brad nailer. This sets the foundation for a professional look.
Managing Material
- Manageable lengths are easier to handle by yourself.
- Cut boards slightly long at first so you have room to trim.
- Organize your wood so you do not use the wrong piece by mistake.
- Sawhorses keep your workspace clean and save your back.
The Snug Fit Technique
- Barely long cuts allow you to wedge the board into place.
- A snug fit means there are no visible gaps at the joints.
- Sand the ends slightly if the board is just a tiny bit too big.
- Snap-fit pieces often stay on the wall even without nails.
Marking in Place
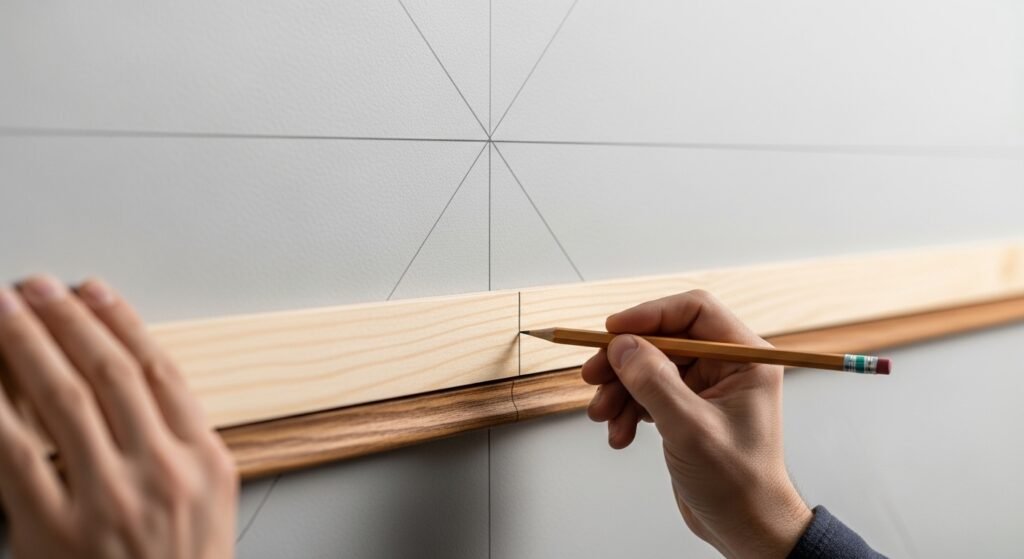
Hold the actual board against the wall where it needs to go. Mark the cut line directly on the wood with a pencil. This is much more accurate than using a measuring tape. It accounts for walls that might be slightly crooked. This trick ensures your geometric accent wall looks perfect. It is a favorite method for pro carpenters.
Securing the Trim
- Liquid nails should be applied in a zigzag pattern on the back.
- Remove tape piece by piece as you install the wood.
- Brad nailer use should be frequent to hold the wood while glue dries.
- Nail into studs whenever possible for the strongest hold.
Professional Finishing Techniques
The finish work is what makes the wall look like part of the house. You need to hide all the nails and joints. Taking your time here prevents the wall from looking “DIY”. Sanding is the most boring part but also the most important. Use a good light to check for any bumps or gaps. This is the final step before the color goes on.
Filling Nail Holes
Use a high-quality spackling to fill every single nail hole. Pink-to-white spackle is great because it tells you when it is dry. Overfill the holes slightly so you can sand them flat. This makes the nails completely disappear under the paint. It creates the look of a solid, custom-built wall. Do not skip this step or the wall will look unfinished.
Sanding for Seamless Joints
- 220 grit sandpaper is for the first pass to remove big bumps.
- 440 grit sandpaper makes the wood feel like silk.
- Dust hack involves using tape to catch the sanding dust.
- Sand every joint until you cannot feel the seam with your finger.
Strategic Caulking
- Paintable caulk is for the gaps between the wood and the wall.
- Avoid over-caulking because it can hide the crisp lines of the trim.
- Ceiling and corners are the most important places to caulk.
- Wipe excess caulk with a damp cloth for a clean look.
Final Painting
Use a foam roller for the final coat of paint. It leaves a very smooth finish on the wood trim. You will need two coats to get a uniform pattern. Make sure you get into the corners with a small brush. The paint should cover the caulk and spackle completely. This final step brings the whole geometric accent wall together.
Sheen Selection for Maximum Impact
- Matte finish is great for hiding small mistakes in the wood.
- Eggshell finish is easy to clean and reflects light well.
- Satin finish makes the geometric pattern really stand out.
- Consistent sheen between the wall and trim is the goal.
Enhancing the Wall with Lighting
Lighting can make your wall look even better. Shadows are what make a 3D version work. You can use different types of lights to show off the angles. Good lighting makes the room feel cozy at night. It turns the wall into the main focal point of the space. Even cheap lights can make a huge difference.
Grazing Light Techniques
Grazing light means the light hits the wall from a sharp angle. This makes the shadows of the wood trim much longer. It emphasizes the depth of the geometric accent wall. You can use recessed lights in the ceiling for this effect. It makes the pattern look very dramatic and bold. This is a pro trick used in high-end interior design.
Sconce Integration
Installing wall sconces directly on the pattern is very stylish. You need to plan this before you nail the boards. The wires should be hidden behind the trim if possible. Sconces provide a warm glow that highlights the wood. It makes the bedroom feel like a fancy hotel. Make sure the lights do not block the coolest parts of your design.
Troubleshooting Common DIY Challenges
Things do not always go perfectly during a home renovation. You might make a bad cut or hit a pipe. Do not panic if something goes wrong. Most mistakes on a geometric accent wall are easy to fix. Knowing how to pivot is part of being a good DIYer. Keep extra wood and glue on hand just in case.
The “Short Cut” Fix
- Wood filler can fill a small gap if a board is too short.
- Creative sanding can help blend a bad joint together.
- Scrap pieces can be used to test a new angle before recutting.
- Caulk can hide a lot of sins where boards meet the wall.
Nail Blowouts
A nail blowout happens when the nail goes out the side of the wood. This usually happens if the nailer is held at a bad angle. Use pliers to pull the nail out from the back if you can. Fill the hole with spackle and sand it smooth. It is a common mistake that happens even to pros. Just be careful around your fingers when it happens.
Adhesive Failure
Sometimes the liquid nails do not grab right away. This usually happens on walls that are very crooked. Use more brad nails to hold the board tight until the glue dries. You can also use painter’s tape to hold it in place overnight. Once the glue cures, the board will not move. Patience is the best tool for this problem.
Safety and Best Practices
Safety should always be your top priority. Power tools are fast but they can be dangerous. Working in a clean space helps you stay focused. This project is fun, but you have to respect the tools. Following best practices ensures you finish with all your fingers. It also makes the final wall look much better.
MDF Safety
- PPE is a must because MDF dust is very fine and bad to breathe.
- Wear a mask every time you use the miter saw.
- Safety glasses protect your eyes from flying wood chips.
- Ventilation helps keep the dust from settling all over your house.
Cleanliness
A messy workspace leads to mistakes. Keep your sawhorses clear of scrap wood. Vacuum up the dust before you start painting. Dirt can get under the paint and ruin the smooth finish. A clean wall helps the liquid nails stick much better. Taking five minutes to clean up every hour saves time later.
Timeline Expectations
- Day One should be for planning, mapping, and installation.
- Day Two is for finishing, sanding, and painting.
- 24 hours is usually enough time for the glue and paint to cure.
- Do not rush the sanding phase if you want a pro look.
Maintenance and Longevity
Your new wall will look great for years if you take care of it. Wood trim can gather dust on the flat edges. It might also move a little as the seasons change. Regular checks keep the wall looking fresh and new. It is a permanent part of your home now. Treat it like any other fine furniture in the room.
Cleaning the Ridges
Dust will settle on the horizontal boards over time. Use a soft brush or a microfiber cloth to wipe them down. A vacuum with a brush attachment works well too. Do not use harsh chemicals on the paint. Simple dusting keeps the lines looking crisp and clean. It only takes a few minutes once a month.
Seasonal Expansion
Wood expands and contracts with the weather. You might see small cracks in the caulk during the winter. This is normal for any home with wood trim. You can easily touch these up with a little more caulk and paint. It is a simple part of home improvement. Keeping your home at a steady humidity helps prevent this.
Conclusion and Encouragement
Building a geometric accent wall is a huge win for any DIYer. It is a low-cost project that makes a massive impact. You will feel proud every time you walk into the room. It is the perfect way to learn new carpentry skills. Do not let the fear of angles stop you from trying. Your home deserves a little bit of custom art.
The DIY Mindset
If you are on the fence, just start by buying the tape. Mapping the wall is the best way to get excited. Remember that every mistake can be fixed with wood filler and paint. You are capable of doing great things in your home. This project is about having fun and being creative. You will be surprised at how easy it actually is.
Final Transformation
Think about the before and after of your space. A plain room becomes a stylish retreat in just one weekend. Your dining room or bedroom will finally have its own personality. Now, go grab your miter saw and start your own geometric accent wall today!
Frequently Asked Questions
What is the best wood for a geometric wall if MDF is unavailable?
Finger-jointed pine is the best alternative. It is more stable than solid wood, less prone to warping, and comes pre-primed, which provides a smoother finish than raw cedar or common board.
Can this be installed over wallpaper?
It is not recommended. The weight of the wood and the moisture in the adhesive can cause the wallpaper to peel or bubble, compromising the structural integrity of the design.
How do I handle electrical outlets in the middle of a pattern?
Use electrical box extenders to bring the outlet flush with the new trim. You can also paint the outlet covers the same color as the wall to make them disappear into the design.
Does a geometric wall make a small room look smaller?
Generally, no. Vertical and diagonal lines can actually draw the eye upward and outward, creating an illusion of more space, especially when using a monochromatic color scheme.
What is the best way to handle a wall that is not perfectly flat?
Use wood shims behind the trim pieces to keep them straight. Fill the resulting gaps between the trim and the wall with paintable caulk to create a seamless appearance.
Is it possible to do this in a rental property?
You can create a “removable” version by nailing the trim to thin 1/4-inch plywood sheets and hanging the sheets like large pictures using heavy-duty French cleats.
How do I calculate the angles if my corners aren’t a perfect 90 degrees?
Use a digital protractor to measure the actual angle of the corner. Divide that number by two to determine the exact degree for each miter cut.
Can I use a different thickness of wood for different parts of the design?
Yes. Using varying depths (e.g., mixing 1-inch and 1/2-inch thick boards) adds extra dimension and creates a more complex shadow play on the wall.
How long should I wait for the adhesive to cure before painting?
Wait at least 24 hours. If the adhesive is still gassing off or shifting, it can cause the paint to crack or the caulk to pull away from the joints.
What should I do if my brad nailer leaves deep dimples in the MDF?
Adjust the depth-of-drive setting on your nailer so the nail head sits just below the surface. If the holes are deep, use wood filler rather than spackle for a more durable patch.
Can I install a geometric wall in a bathroom with high humidity?
Yes, but avoid MDF as it swells when wet. Use PVC trim or solid pine treated with a high-quality moisture-resistant primer and semi-gloss paint.
Is it better to use a brush or a sprayer for the final coat?
A HVLP (High Volume Low Pressure) sprayer provides the most professional, factory-like finish. If using a roller, a 1/4-inch nap or foam roller is best to avoid heavy texture.
How do I transition the pattern into a vaulted or sloped ceiling?
Determine the slope of the ceiling using a T-bevel. Cut the top ends of your vertical or diagonal boards to match that specific slope so they sit flush against the ceiling line.
Should I remove the carpet before installing the accent wall?
It is not necessary, but you should pull back the edges if you are replacing the baseboards. Ensure the new baseboard sits at the correct height for the carpet to be tucked back under.
Can I use liquid nails alone without a nail gun?
It is difficult because the boards may slide or bow before the glue sets. If you don’t have a nail gun, use heavy-duty painter’s tape or bracing to hold each piece until the adhesive bonds.
What is the best way to hide the seams where two boards meet on a long run?
Use a 45-degree scarf joint rather than a butt joint. Glue the joint, nail it securely, and sand it extensively until the transition is undetectable to the touch.
How do I choose the right width for the trim?
Standard 1.5-inch to 2-inch widths work for most rooms. Use wider boards (3-inch+) for very large, high-ceiling spaces to ensure the pattern doesn’t look “thin” or spindly.
Does the pattern need to be continuous across the whole wall?
No. Negative space can be a design element. Some modern designs involve a “shattered” look where the pattern is concentrated in one corner and fades out.
What if I want to mount a TV over the geometric pattern?
Plan the pattern so that the TV mount can be screwed directly into the wall studs between the trim pieces. Ensure the trim doesn’t interfere with the TV sitting level.
How do I clean the wall without damaging the paint?
Use a damp microfiber cloth with a small amount of dish soap. Avoid abrasive scrubbers, especially on matte or flat finishes, as they can “burnish” or create shiny spots on the paint.