
Removing wallpaper can be a big task, but it doesn’t have to be hard. With the right tools and steps, you can do it yourself. Whether you’re updating a room or prepping the walls for a new look, this guide will help you remove wallpaper with ease. Let’s get started!
Why Should You Remove Wallpaper?
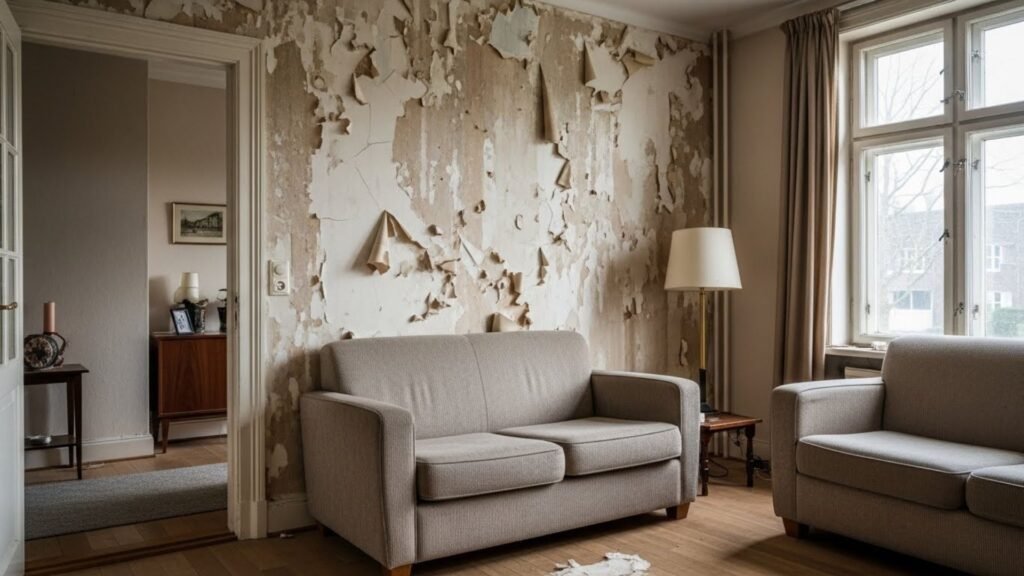
Wallpaper can add style to a room, but over time, it can become outdated or damaged. Removing wallpaper is part of home renovation projects. It gives you a fresh start for painting or adding new wallpaper. Here are some reasons why you may want to remove wallpaper:
- Outdated designs: Wallpaper can get old-fashioned or faded, making your room look tired.
- Damage: Wallpaper can peel, tear, or get dirty, which may make the room feel unkempt.
- Preparing for a new finish: If you want to repaint or install new wallpaper, removing the old one is the first step.
Removing wallpaper can also be a fun DIY project that saves you money compared to hiring a professional. Plus, it’s a great way to update your home.
Identifying Wallpaper Types and Wall Surfaces
Before you begin, it’s important to know what you’re working with. The type of wallpaper and the wall surface will change how you remove it.
Types of Wallpaper:
- Peelable wallpaper: This wallpaper comes off easily in large pieces.
- Strippable wallpaper: You can peel off the top layer, but the backing might stay on.
- Vinyl-coated wallpaper: This is tough and water-resistant. It often needs steam or special tools to remove.
- Textured wallpaper: Textured wallpapers may require stronger methods to get rid of.
- Traditional paper wallpaper: This is the most difficult to remove. It’s often very well glued to the wall.
Types of Wall Surfaces:
- Drywall: This is the most common type of wall. It’s easy to work with but can get damaged if you scrape too hard.
- Plaster: Older homes may have plaster walls. These are more delicate and need to be treated carefully.
Gather the Right Tools for Wallpaper Removal
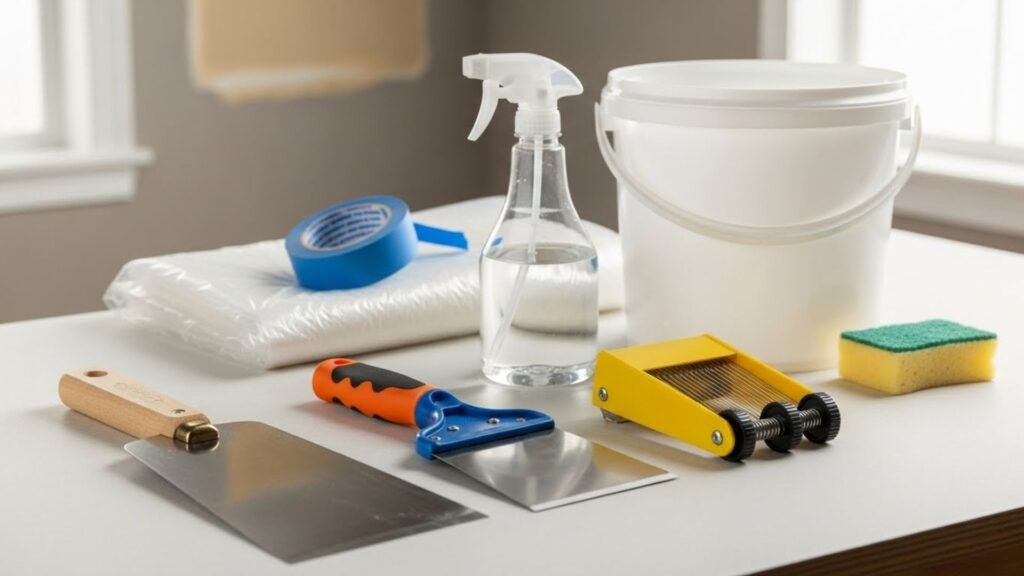
The right tools can make the process much easier. Here’s what you’ll need:
Basic Tools:
- Plastic drop cloths or painter’s tarp: Protect your floors from water and debris.
- Painter’s tape: Use it to secure the drop cloths and protect edges of walls and trim.
- Putty knife or scraper: These tools help lift the wallpaper without damaging the wall.
- Wallpaper scoring tool: Use this tool to score the wallpaper so that water or solution can soak through.
- Sponge and bucket of water: For cleaning the wall after you remove the wallpaper.
- Spray bottle or garden sprayer: To apply the wallpaper removal solution.
- Chemical wallpaper stripper or DIY solution: You can use a store-bought chemical stripper or make a solution with fabric softener, vinegar, or dish soap mixed with water.
Optional Tools:
- Wallpaper steamer: This tool uses hot steam to soften the adhesive, making it easier to remove wallpaper.
- Bucket for mixing solutions: To hold your water and homemade solutions.
How to Protect Your Home During Wallpaper Removal
Wallpaper removal can be messy. It’s important to protect your home before you start.
Clear the Room and Protect the Floor
Move any furniture out of the room or cover it with plastic sheets. The floor will likely get wet, so place a plastic drop cloth or painter’s tarp on the floor to protect it. Use painter’s tape to keep the tarp in place.
Cover Electrical Outlets and Switches
Remove outlet covers and switch plates to prevent water from getting into the electrical system. It’s also a good idea to turn off the electricity to the room to avoid any accidents.
Understanding Wallpaper Removal: Peelable vs. Strippable
Before you begin removing the wallpaper, it’s important to know what type of wallpaper you have.
Peelable Wallpaper:
Peelable wallpaper is the easiest to remove. You can simply pull it off in big sections without much effort.
Strippable Wallpaper:
If the top layer of your wallpaper peels off easily, but the backing stays stuck, you have strippable wallpaper. In this case, you’ll need to remove the backing with a wallpaper scoring tool or by soaking it with a wallpaper solution.
Preparing the Room for Wallpaper Removal
Now that you know what kind of wallpaper you’re dealing with, it’s time to prepare the room.
Step 1: Clear the Room
Start by moving all furniture out of the room. If you can’t move it, cover it with plastic sheeting or drop cloths. This will protect your furniture from any mess during the removal process.
Step 2: Protect the Floor
Use a plastic drop cloth or painter’s tarp to cover the floor. The wallpaper removal process can get messy, and this will protect your floors from water and wallpaper bits.
Step 3: Tape Off the Edges
Use painter’s tape to tape off the edges of your walls, window trim, and baseboards. This will keep them safe from water and any solution you might use.
Step 1: Peel Off Wallpaper with Ease (For Peelable Wallpaper)
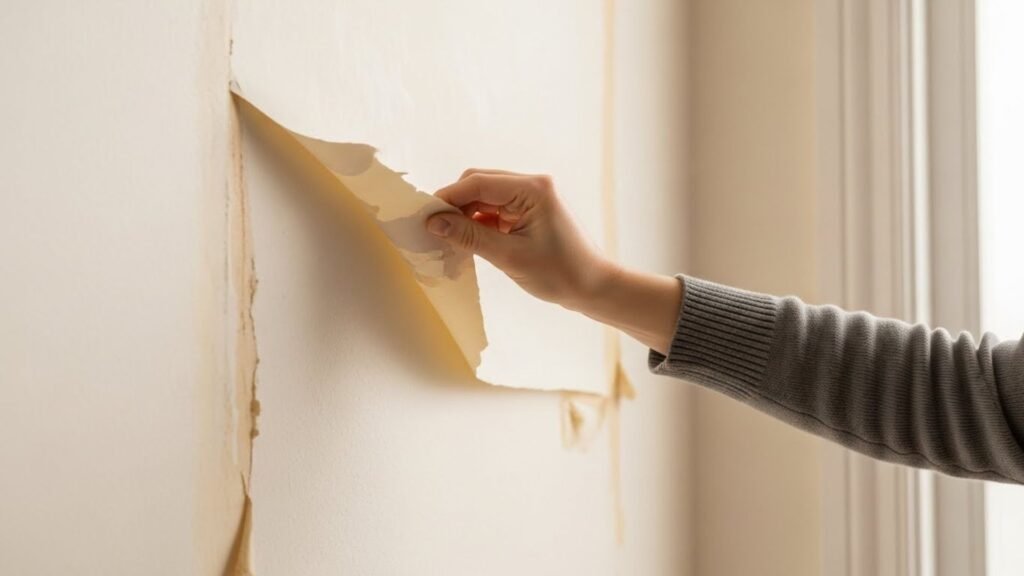
If you’re lucky enough to have peelable wallpaper, this will be the easiest part of the process. Peelable wallpaper is designed to come off in large, intact sections without leaving a mess behind. Here’s how you can remove it:
How to Remove Peelable Wallpaper:
- Find a corner or edge: Start at the top of the wall or at a corner. Gently pull the wallpaper from the wall. It should come off in long strips without tearing.
- Pull slowly and steadily: Take your time and peel the wallpaper slowly. If it comes off in large sheets, great! If not, move on to the next step.
- Remove any leftover backing: Some peelable wallpapers have a paper backing left behind. You may need to scrape it off with a putty knife or wallpaper scraper. Use gentle pressure to avoid damaging the wall.
Peelable wallpaper removal is a straightforward process, but not every wallpaper type will peel this easily. If you’re dealing with more stubborn wallpaper, let’s move on to the next steps.
Step 2: Use a Scoring Tool for Strippable or Stubborn Wallpaper
When you’re working with strippable wallpaper or wallpaper that’s difficult to peel off, you’ll need to score it first. This creates tiny holes or perforations in the wallpaper, allowing your water solution or wallpaper stripper to seep in and loosen the adhesive.
How to Use a Wallpaper Scoring Tool:
- Score the wallpaper: Use a wallpaper scoring tool to make small perforations in the wallpaper. Start at the top and work your way down in small sections.
- Be careful not to damage the wall: Scoring is meant to help the solution penetrate the wallpaper, so don’t press too hard. Light pressure is enough to puncture the surface.
Tip: If your wallpaper has several layers, scoring the top layer will help loosen the underlying paper or backing.
Step 3: Apply a Solution to Loosen the Adhesive
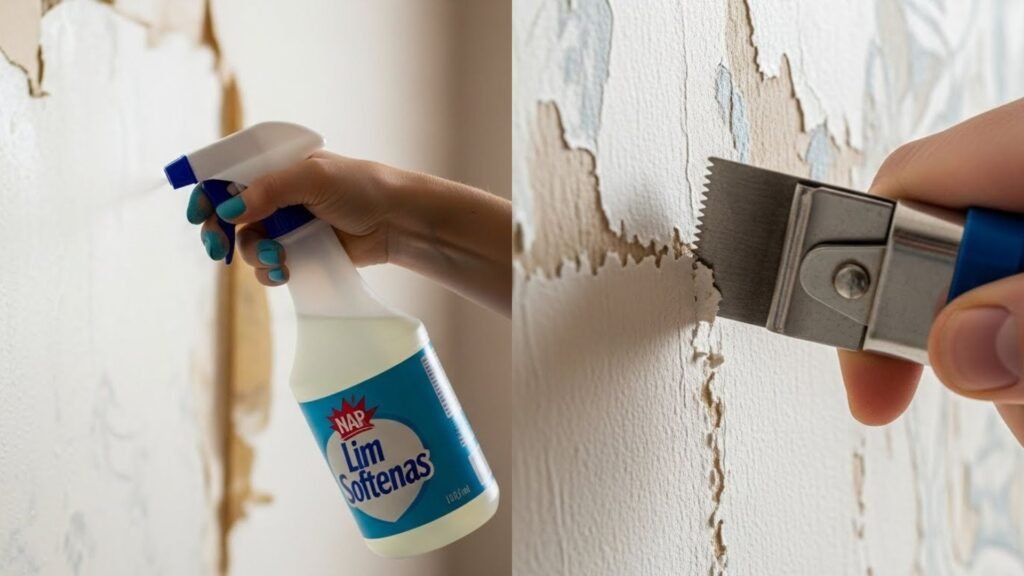
Once you’ve scored the wallpaper, the next step is to apply a solution that will help break down the wallpaper adhesive. You have several options here: a chemical wallpaper stripper, a vinegar solution, or a fabric softener solution.
DIY Solutions for Wallpaper Removal:
Here are some of the most effective DIY wallpaper removal solutions:
Vinegar Solution:
- Mix: Combine equal parts of white vinegar and hot water in a spray bottle or bucket.
- Apply: Spray the mixture generously onto the wallpaper. Focus on the scored areas.
- Wait: Let the solution sit for 15–20 minutes to loosen the adhesive.
Fabric Softener Solution:
- Mix: Combine 1 part fabric softener with 3 parts warm water.
- Apply: Spray or wipe the solution onto the wallpaper and wait for 15–20 minutes.
- Scrape: After waiting, use a putty knife or scraper to peel off the wallpaper.
Both of these solutions are cost-effective and widely available. They also don’t have the harsh chemicals found in store-bought strippers, making them a good choice for a DIY project.
Chemical Wallpaper Stripper:
If your wallpaper is particularly stubborn, you may want to consider a commercial wallpaper stripper. These can be found at most hardware stores and can be more effective at breaking down old, tough adhesives. Follow the manufacturer’s instructions carefully, as some strippers may be more potent and require ventilation.
Step 4: Use a Wallpaper Steamer for Stubborn Layers
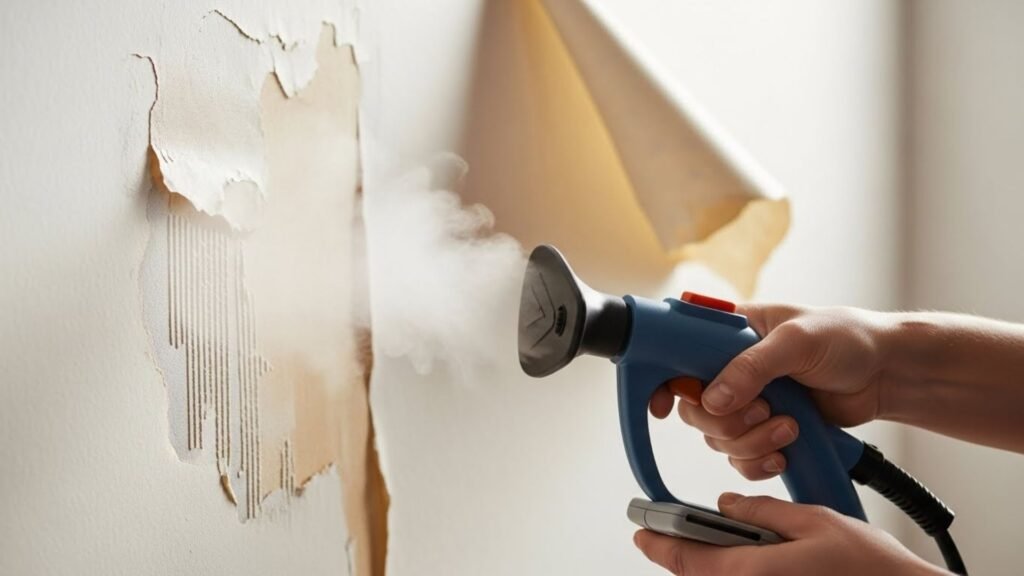
When removing multiple layers of wallpaper or very thick, stubborn wallpaper, a wallpaper steamer is an excellent tool. The steamer softens the wallpaper adhesive, making it much easier to peel off in large sections. This method is ideal for older wallpapers or rooms with lots of wallpaper layers.
How to Use a Wallpaper Steamer:
- Fill the steamer: Add water to the steamer and allow it to heat up.
- Steam a small section: Hold the steamer against the wallpaper for about 5 minutes. The steam will help break down the adhesive, making it easier to peel away.
- Peel the wallpaper: Once the wallpaper is steamed, use a scraper or putty knife to gently lift it from the wall. You should be able to remove large sheets at a time.
- Repeat the process: Continue to steam and scrape until all the wallpaper has been removed.
Wallpaper steamers can be rented or purchased from most home improvement stores, and they can be a lifesaver for large, stubborn wallpaper projects.
Step 5: Scrape Off the Wallpaper
Now that the wallpaper is loosened, it’s time to remove it. This is the step where your putty knife or wallpaper scraper will come in handy.
How to Scrape Off the Wallpaper:
- Start at the edges: Begin scraping the wallpaper at the edges and work your way in. Hold the scraper at a slight angle to avoid gouging the wall.
- Scrape in sections: Work in small sections, focusing on one part of the wall at a time. If the wallpaper doesn’t peel off easily, reapply your solution or use the steamer to loosen it further.
- Be patient: If you’re removing multiple layers, you may need to repeat the soaking or steaming process for each layer of wallpaper.
Step 6: Clean the Walls and Remove Residual Adhesive
After you’ve removed all the wallpaper, you’ll likely find that there’s still some adhesive left on the walls. This leftover adhesive needs to be cleaned off before you can move on to painting or applying new wallpaper.
How to Clean the Walls:
- Apply water and soap: Mix warm water and mild dish soap in a bucket. Use a sponge or cloth to wipe down the walls and remove the adhesive.
- Rinse with clean water: After the adhesive is gone, rinse the walls with clean water to remove any soap residue.
- Dry the walls: Use a clean, dry cloth to wipe the walls and allow them to air dry for 24 hours before applying primer or paint.
Step 7: Repair and Prep the Wall Surface
Once the wallpaper is removed and the walls are cleaned, you may notice that the surface isn’t perfect. Wallpaper removal can sometimes leave behind small holes, gouges, or rough patches. Before you can paint or apply new wallpaper, it’s essential to repair the surface.
How to Repair the Walls:
- Fill holes with spackle or joint compound: If you find small holes or cracks, use spackle or joint compound to fill them. Apply it with a putty knife and smooth it out.
- Sand the surface: Once the spackle has dried, lightly sand the wall to make it smooth and even.
- Prime the walls: Before painting or installing new wallpaper, apply a coat of primer to seal the surface and ensure the best finish.
Step 8: Handling Stubborn Wallpaper Layers
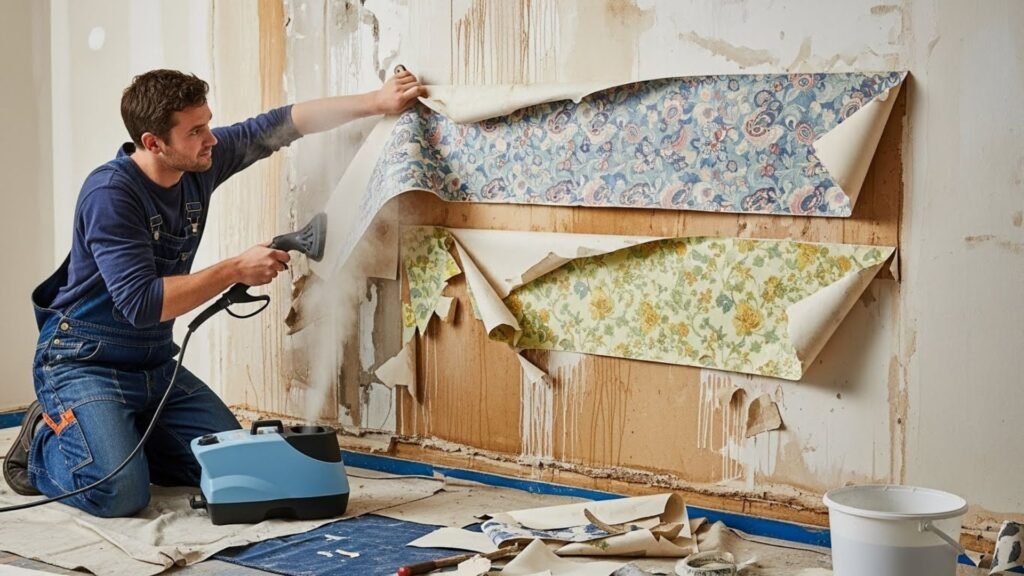
If you’re dealing with stubborn wallpaper that simply won’t come off, don’t worry — there are several advanced techniques to ensure you can finish the job. Here are some methods for tackling tougher wallpapers, especially those with multiple layers or heavy adhesive.
How to Remove Multiple Layers of Wallpaper:
- Score each layer: If your wallpaper has multiple layers, start by scoring each layer before applying your solution. This allows the solution to reach each layer of adhesive, loosening it and making it easier to remove.
- Use a steamer on each layer: A wallpaper steamer can help soften multiple layers of wallpaper. After scoring each layer, apply steam directly to the surface and allow it to sit for several minutes before scraping.
- Use stronger adhesive removers: If the wallpaper has stubborn, thick adhesive, you may need to use a stronger chemical stripper. These products are specifically designed to break down tough adhesives and can make removal easier.
How to Handle Wallpaper with a Thick Vinyl Coating:
- Steam it off: Vinyl-coated wallpaper can be tough because it’s water-resistant. Use a wallpaper steamer to break down the adhesive more effectively. Hold the steamer pad against the wallpaper for about 5 minutes to allow the heat to penetrate and loosen the adhesive.
- Chemical wallpaper stripper: Apply a wallpaper stripper to the vinyl-coated wallpaper after scoring. This will help soften the adhesive beneath the vinyl layer. Let it sit for 10–15 minutes before scraping.
How to Remove Textured or Fabric Wallpaper:
- Scoring is essential: Textured wallpaper, such as bamboo or fabric, requires extra care. Begin by scoring the wallpaper gently, but thoroughly. This will ensure that the solution can reach the adhesive behind the texture.
- Use hot water solutions: For fabric wallpaper, a hot water and fabric softener solution works wonders. Apply it generously to the wallpaper, wait for 15–20 minutes, and then begin scraping it off.
Step 9: Common Mistakes to Avoid During Wallpaper Removal
While wallpaper removal may seem straightforward, it’s easy to make mistakes that can delay your progress or damage the walls. Here are some common pitfalls to avoid:
Mistake 1: Rushing the Process
- Why it’s a problem: Trying to rush through the removal process can lead to mistakes, such as damaging the wall or leaving adhesive behind.
- How to avoid it: Be patient. Allow the wallpaper removal solution or steamer to sit long enough to loosen the adhesive. Take your time when scraping to avoid gouging the walls.
Mistake 2: Not Protecting the Room Properly
- Why it’s a problem: Failing to protect the floor, furniture, and electrical outlets can lead to messy cleanup and potential damage to your home.
- How to avoid it: Always cover the floors with plastic drop cloths or painter’s tarps, tape down the edges, and remove or cover any furniture. Don’t forget to cover the outlet covers and turn off the electricity.
Mistake 3: Using Too Much Water or Solution
- Why it’s a problem: Excess water or solution can damage the wall, especially if it seeps into cracks or joints in the drywall.
- How to avoid it: Apply the solution carefully. Use a spray bottle or garden sprayer for even application and avoid soaking the wall. If necessary, reapply in sections and wait for the solution to soak in before continuing.
Mistake 4: Skipping Wall Preparation
- Why it’s a problem: Not properly preparing the wall after removing the wallpaper can result in uneven paint, peeling, or a poor finish.
- How to avoid it: After removing the wallpaper, clean the walls thoroughly to remove any leftover adhesive. Repair any damage and prime the walls before painting or adding new wallpaper.
Step 10: Cleaning the Walls After Wallpaper Removal
Once the wallpaper has been removed, there will likely be residual adhesive or paste left on the walls. It’s essential to clean the walls thoroughly to ensure that you can paint or re-wallpaper without any issues.
How to Clean the Walls After Removing Wallpaper:
- Clean with a warm water and soap solution: Mix a small amount of dish soap with warm water in a bucket. Use a sponge or rag to wipe down the walls and remove any leftover adhesive.
- Rinse with clean water: After washing the walls, rinse them with clean water to remove any soap residue.
- Dry the walls: Use a clean, dry towel or cloth to dry the walls. Allow the walls to air dry for at least 24 hours before applying primer or paint.
How to Remove Stubborn Adhesive:
If adhesive remains after cleaning, use a commercial adhesive remover or apply a solution of vinegar and water. Soak a cloth in the solution, then gently rub the adhesive with it. Be sure not to scrub too hard, as this could damage the wall surface.
Step 11: Repairing the Wall After Wallpaper Removal
Wallpaper removal can sometimes leave small holes, scratches, or uneven areas on your walls. Repairing these imperfections is essential to prepare the walls for painting or new wallpaper.
How to Repair Small Holes and Imperfections:
- Use spackle or joint compound: For small holes and dents, apply spackle or joint compound with a putty knife. Smooth it out to fill the hole and let it dry completely.
- Sand the surface: After the spackle or compound dries, use fine-grit sandpaper to smooth the surface. This will help create a uniform surface for painting or applying new wallpaper.
- Prime the wall: After repairs, apply a coat of primer to seal the wall and prevent uneven finishes.
Step 12: Preparing the Wall for New Wallpaper or Paint
Once the wall is repaired and cleaned, it’s time to prep the surface for the next phase of your project. Whether you’re painting or applying new wallpaper, proper wall preparation ensures that the new finish adheres well and looks professional.
How to Prime the Wall:
- Use a high-quality primer: Apply a primer designed for drywall or plaster. This helps seal the surface and ensures better adhesion of paint or wallpaper.
- Allow the primer to dry completely: Let the primer dry for the recommended time before applying paint or wallpaper.
How to Paint the Wall:
- Choose the right paint: Select a high-quality paint for your wall. Use a brush or roller to apply an even coat of paint. Wait for it to dry before applying a second coat if necessary.
Step 13: Final Touches and Room Transformation
Once the wallpaper is removed, the walls are cleaned, and the surface is prepped, it’s time for the final touches. Whether you’re painting, installing new wallpaper, or applying another wall treatment, you’re one step away from transforming your space.
Painting the Wall:
- If you plan to paint, choose a color that complements your room’s design. Consider adding a feature wall with a bold color or wallpaper for a modern touch.
Installing New Wallpaper:
- When installing new wallpaper, measure your walls carefully and apply the wallpaper according to the manufacturer’s instructions. Take your time to align the wallpaper for a smooth, seamless finish.
Step 14: Handling Leftover Adhesive
Even after you’ve removed the wallpaper and cleaned the wall, there might still be some adhesive residue left behind. This can affect how new wallpaper or paint adheres to the wall, so it’s important to remove it completely.
How to Remove Residual Adhesive:
- Use a commercial adhesive remover: There are many adhesive removers available at hardware stores that are designed specifically for this purpose. Apply the remover to the remaining adhesive and let it sit for a few minutes.
- DIY adhesive remover solution: You can also make your own solution using equal parts of vinegar and warm water. Apply the solution to the adhesive using a sponge, let it sit for a few minutes, and then gently scrub it off.
- Scrape the adhesive: After applying the solution, use a putty knife or scraper to remove any leftover adhesive. Be gentle to avoid damaging the wall.
- Rinse and dry the wall: Once the adhesive is removed, rinse the wall with clean water to remove any cleaning solution or residue. Dry the wall with a clean cloth and let it air dry completely.
Step 15: Repairing Wall Imperfections After Wallpaper Removal
Once the wallpaper and adhesive are completely removed, you may notice that the wall has small holes, gouges, or other imperfections. It’s important to repair these before you move on to painting or applying new wallpaper.
How to Repair Small Holes and Scratches:
- Fill with spackle or joint compound: For small holes or cracks, apply spackle or joint compound with a putty knife. Smooth it out evenly and allow it to dry completely.
- Sand the wall: After the spackle or compound dries, use fine-grit sandpaper to sand the area smooth. This will ensure that the surface is even and ready for painting or wallpaper.
- Clean the area: Once the surface is smooth, wipe it down with a damp cloth to remove any dust created from sanding.
How to Repair Larger Wall Damage:
- Use a wall repair patch: If there are larger holes or damage, you may need to apply a wall repair patch. Follow the manufacturer’s instructions for application.
- Apply joint compound over the patch: Once the patch is in place, cover it with joint compound, then sand the area smooth once it’s dry.
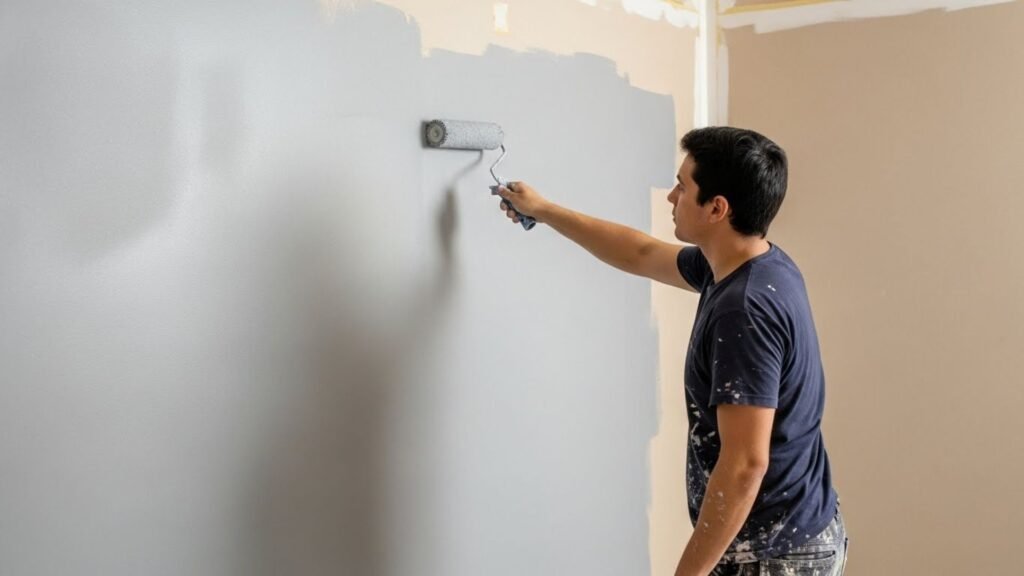
Step 16: Priming the Wall for New Wallpaper or Paint
After repairing the wall, it’s important to prime it before you begin applying new wallpaper or paint. Primer ensures that the new finish adheres properly to the surface and creates a smooth, even base for whatever finish you choose.
How to Apply Primer:
- Choose the right primer: For drywall, choose a high-quality drywall primer. For plaster or other surfaces, use a primer specifically designed for those materials.
- Apply a thin, even coat: Using a brush or roller, apply a thin and even coat of primer to the entire wall. Make sure to cover all areas, including repaired spots.
- Allow it to dry: Let the primer dry for the recommended time (usually 1–2 hours, depending on the product). Check the manufacturer’s instructions for the exact drying time.
Why Priming Matters:
Priming the wall helps:
- Seal the surface and prevent moisture absorption.
- Provide a smooth surface for better paint or wallpaper adhesion.
- Hide imperfections and create a uniform look.
Step 17: Painting the Wall
After priming, you’re ready to paint the wall if you’re not applying new wallpaper. Whether you’re going for a single solid color or a more intricate design, the key to a flawless paint job is using the right tools and techniques.
How to Paint the Wall:
- Choose the right paint: Select a high-quality paint that suits your space. For example, use a washable paint in high-traffic areas like kitchens or bathrooms.
- Apply paint in sections: Start from the top of the wall and work your way down. Use a brush to cut in around the edges and a roller for the larger surface areas.
- Use multiple coats: Apply a second coat of paint if needed to achieve an even, rich finish. Let the first coat dry before applying the second.
Paint Tips:
- Use painter’s tape: To create sharp, clean lines around edges, windows, and trim, use painter’s tape before you begin painting.
- Let each coat dry completely: This will help avoid streaking and ensure that your final coat adheres properly.
Step 18: Installing New Wallpaper
If you’re choosing to reinstall wallpaper, the wall must be properly primed and prepped to ensure the wallpaper adheres well and lasts long. Here’s a simple step-by-step guide to installing new wallpaper:
How to Install New Wallpaper:
- Measure your wall: Measure the height and width of your walls before purchasing wallpaper. Make sure to account for any windows, doors, or other features.
- Cut wallpaper to size: Cut the wallpaper into strips that are slightly longer than the height of your wall. This will help you trim the excess once it’s applied.
- Apply wallpaper paste or adhesive: Depending on the type of wallpaper, apply wallpaper paste or adhesive to the wall or the back of the wallpaper.
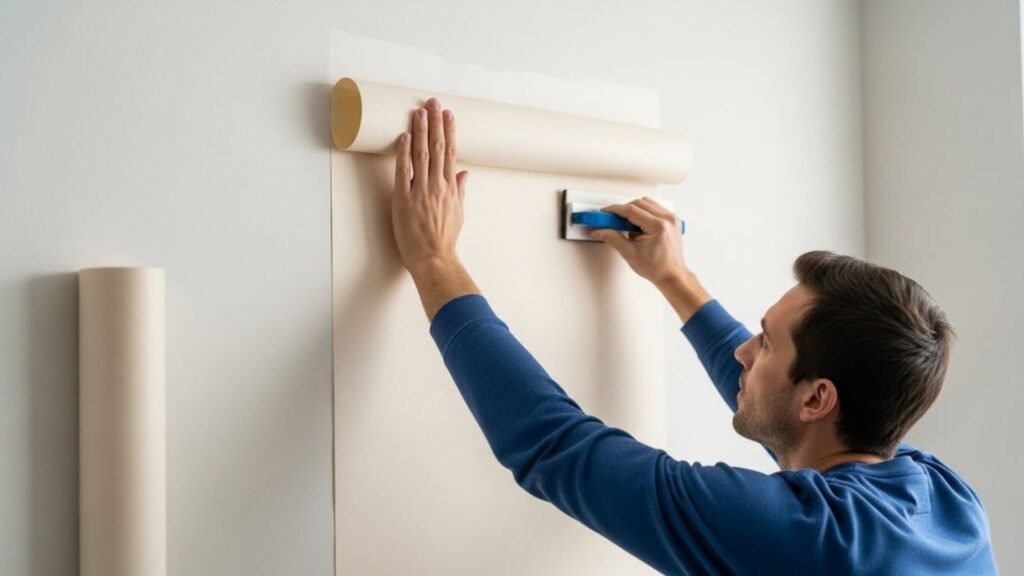
- Position the wallpaper: Start at the top of the wall and press the wallpaper against the wall, smoothing it as you go. Use a wallpaper smoothing tool to get rid of air bubbles and wrinkles.
- Trim excess wallpaper: Once the wallpaper is in place, trim the excess at the bottom and edges using a sharp utility knife.
Step 19: Final Touches and Room Transformation
Once your new paint or wallpaper is in place, it’s time to add the finishing touches to your room.
How to Complete the Room Transformation:
- Install trim or moldings: Adding crown molding or baseboards can give your room a polished look.
- Decorate the room: Now that your walls are fresh and new, it’s time to add furniture, curtains, and other décor that complements the updated space.
- Enjoy the transformation: Stand back and admire your hard work! You’ve successfully removed wallpaper and transformed your room.
Step 20: Post-Removal Maintenance and Tips
Now that your walls are ready, it’s important to keep them looking fresh. Here are some tips for maintaining your new wall treatment:
How to Maintain Painted Walls:
- Dust regularly: Keep your walls clean by dusting them often with a soft cloth.
- Touch up when needed: If you notice any scuffs or marks on the walls, use leftover paint to touch up those areas.
How to Maintain Wallpaper:
- Clean with care: Use a damp cloth to gently wipe wallpaper. Be careful not to get it too wet, as excess moisture can damage wallpaper.
- Fix any peeling edges: If the edges of the wallpaper begin to peel, apply a small amount of adhesive to reattach them.
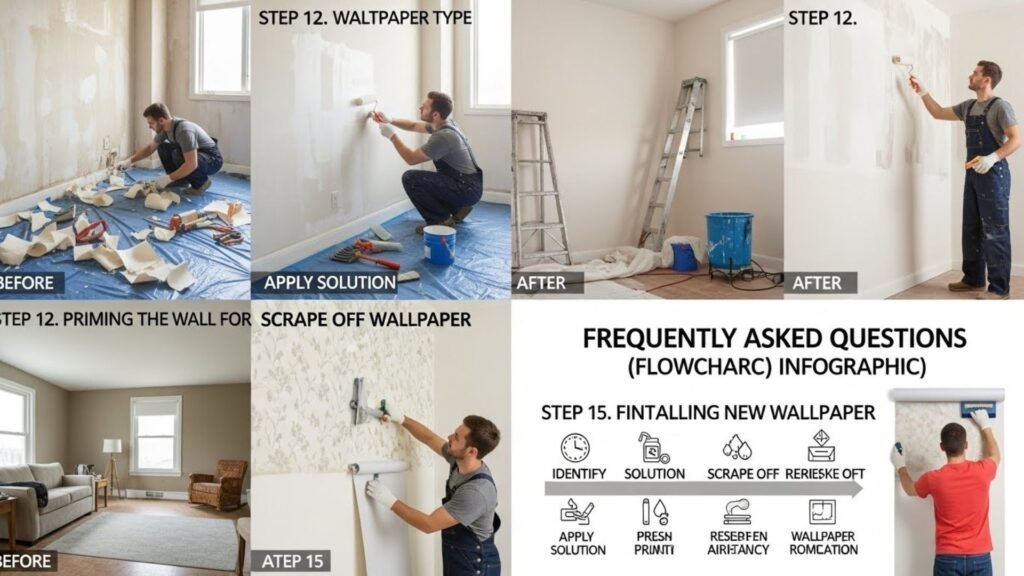
Summary of Key Steps for Wallpaper Removal
To ensure a successful wallpaper removal process, it’s important to follow the steps in a logical, systematic order. Let’s summarize the steps we’ve covered:
- Prepare the Room: Start by clearing the room, protecting the floors with dropcloths, and securing the outlet covers. This ensures that you protect your surroundings and prevent any damage or mess.
- Identify Wallpaper Type: Knowing what type of wallpaper you’re dealing with helps determine the best removal method. Peelable, strippable, and stubborn wallpapers all require different approaches.
- Gather the Right Tools: Have all necessary tools ready, including a putty knife, scraper, scoring tool, spray bottle, wallpaper steamer, and your wallpaper removal solution (whether store-bought or DIY).
- Remove Wallpaper: Use the appropriate method — peeling, scoring, soaking, or steaming — depending on the type of wallpaper. Take your time and apply solutions to loosen adhesives before scraping.
- Clean the Walls: After removing the wallpaper, wash the walls to remove any remaining adhesive. This will prepare the surface for painting or new wallpaper.
- Repair Wall Damage: Fill in any holes, scratches, or gouges left behind by the wallpaper and smooth the wall with a sanding block. Proper repairs will create a smooth surface for your next finish.
- Prime and Paint or Install New Wallpaper: Once the wall is prepped and dry, apply primer to seal the surface, then paint or apply new wallpaper to complete your transformation.
By following these steps, you will ensure that your room gets a fresh, new look, whether you’re painting the walls or putting up fresh wallpaper.
Additional Tips for Wallpaper Removal Success
Here are a few additional tips that will help ensure your wallpaper removal goes smoothly:
- Be Patient: Wallpaper removal can take time. Don’t rush the process. Allow the solution to soak in, and take your time when scraping to avoid damaging the wall.
- Use the Right Tools: Always use a putty knife or wallpaper scraper that is flexible but sturdy. If you’re removing multiple layers, a wallpaper steamer can be invaluable.
- Start Small: Work in small sections, especially if you’re dealing with old, stubborn wallpaper. It’s easier to control and helps prevent unnecessary mess.
- Don’t Over-Wet the Walls: Excess moisture can damage drywall, especially if it seeps into seams or edges. Use a spray bottle to apply just enough water or solution to loosen the wallpaper.
- Keep the Room Well-Ventilated: If you’re using strong chemical solutions or a steamer, ensure the room is well-ventilated to avoid inhaling fumes.
- Test Solutions on Small Areas First: Always test any wallpaper removal solution on a small area of the wall to check for any adverse effects before applying it to the entire room.
Conclusion: Your Ultimate Guide to Wallpaper Removal
By following the detailed steps we’ve outlined, you can confidently tackle wallpaper removal in any room of your home. Whether you’re updating an old space, prepping for a fresh coat of paint, or applying new wallpaper, understanding the right methods and techniques will make the process much easier.
Wallpaper removal doesn’t have to be a stressful task. With patience, the right tools, and these proven techniques, you can transform any room into a stylish and fresh space. So go ahead, get started on your next home renovation project, and enjoy the satisfaction of a job well done!
Frequently Asked Questions (FAQs)
1. How long does it take to remove wallpaper?
The time it takes to remove wallpaper depends on the size of the room, the type of wallpaper, and the method used. For most rooms, it may take a few hours to a full day. Allow extra time for cleaning, repairing, and priming the walls.
2. Can I remove wallpaper without using chemicals?
Yes! Many DIY solutions such as vinegar, fabric softener, and dish soap mixed with warm water work just as well as chemical removers. These natural solutions are safer and more eco-friendly, but they may take a bit longer to work.
3. What should I do if the wallpaper isn’t coming off?
If the wallpaper isn’t coming off easily, consider using a wallpaper steamer or applying more wallpaper removal solution and waiting a bit longer. If you’re dealing with stubborn layers, use a scoring tool to help the solution penetrate.
4. How do I know if the wallpaper is peelable or strippable?
Peelable wallpaper can be removed in large sections without leaving adhesive behind. Strippable wallpaper has a top layer that peels off easily, but the backing remains on the wall. If you can peel off the top layer without much effort, it’s likely peelable.
5. Can I paint over wallpaper instead of removing it?
While it’s possible to paint over wallpaper, it’s not recommended unless absolutely necessary. Painting over wallpaper can cause peeling or bubbling over time. It’s better to remove the wallpaper first to ensure a smooth, long-lasting finish.
6. How do I remove wallpaper from plaster walls?
Plaster walls are more delicate than drywall, so be gentle when removing wallpaper. Use a wallpaper steamer to soften the adhesive, and be careful not to damage the plaster beneath the wallpaper. You may need to repair small cracks in the plaster before painting or applying new wallpaper.
7. What can I do with leftover wallpaper adhesive?
Leftover adhesive can often be removed with a sponge and warm water. If necessary, use a commercial adhesive remover or a DIY vinegar-water solution to clean up any sticky residue left behind.
8. How should I prepare the walls for painting after removing wallpaper?
After removing wallpaper, clean the walls to remove adhesive, repair any damage with spackle or joint compound, and sand the surface smooth. Apply a primer to seal the wall before painting to ensure the best finish.
9. What’s the best way to remove wallpaper in a rental property?
In a rental property, it’s important to be extra cautious when removing wallpaper to avoid damaging the walls. Consider using a steamer or applying a gentle wallpaper removal solution. Always check with your landlord before making any changes.
10. Should I remove wallpaper before installing new wallpaper?
Yes! For the best results, always remove old wallpaper before installing new wallpaper. This ensures the wall is smooth and adhesive-free, which allows the new wallpaper to adhere properly.